DIY Old to New Headboard

This weekend we embarked on one of our most exciting projects to date and this one did not disappoint. We have been slowly redoing our bedroom, look out for a post of the finished project later this week. Our last major step was our headboard. We have replaced all of the other furniture in the room or added new furniture where needed. Our headboard was the only piece that we felt was worth saving and redoing so we didn’t have to spend a couple hundred dollars on a new one that matched our bedroom set. So one night I came up with an idea, it seemed a bit difficult but we decided it could be done. After our bench spray painting success we decided to embark on another project.

So we started with this

Headboard-1Headboard-8

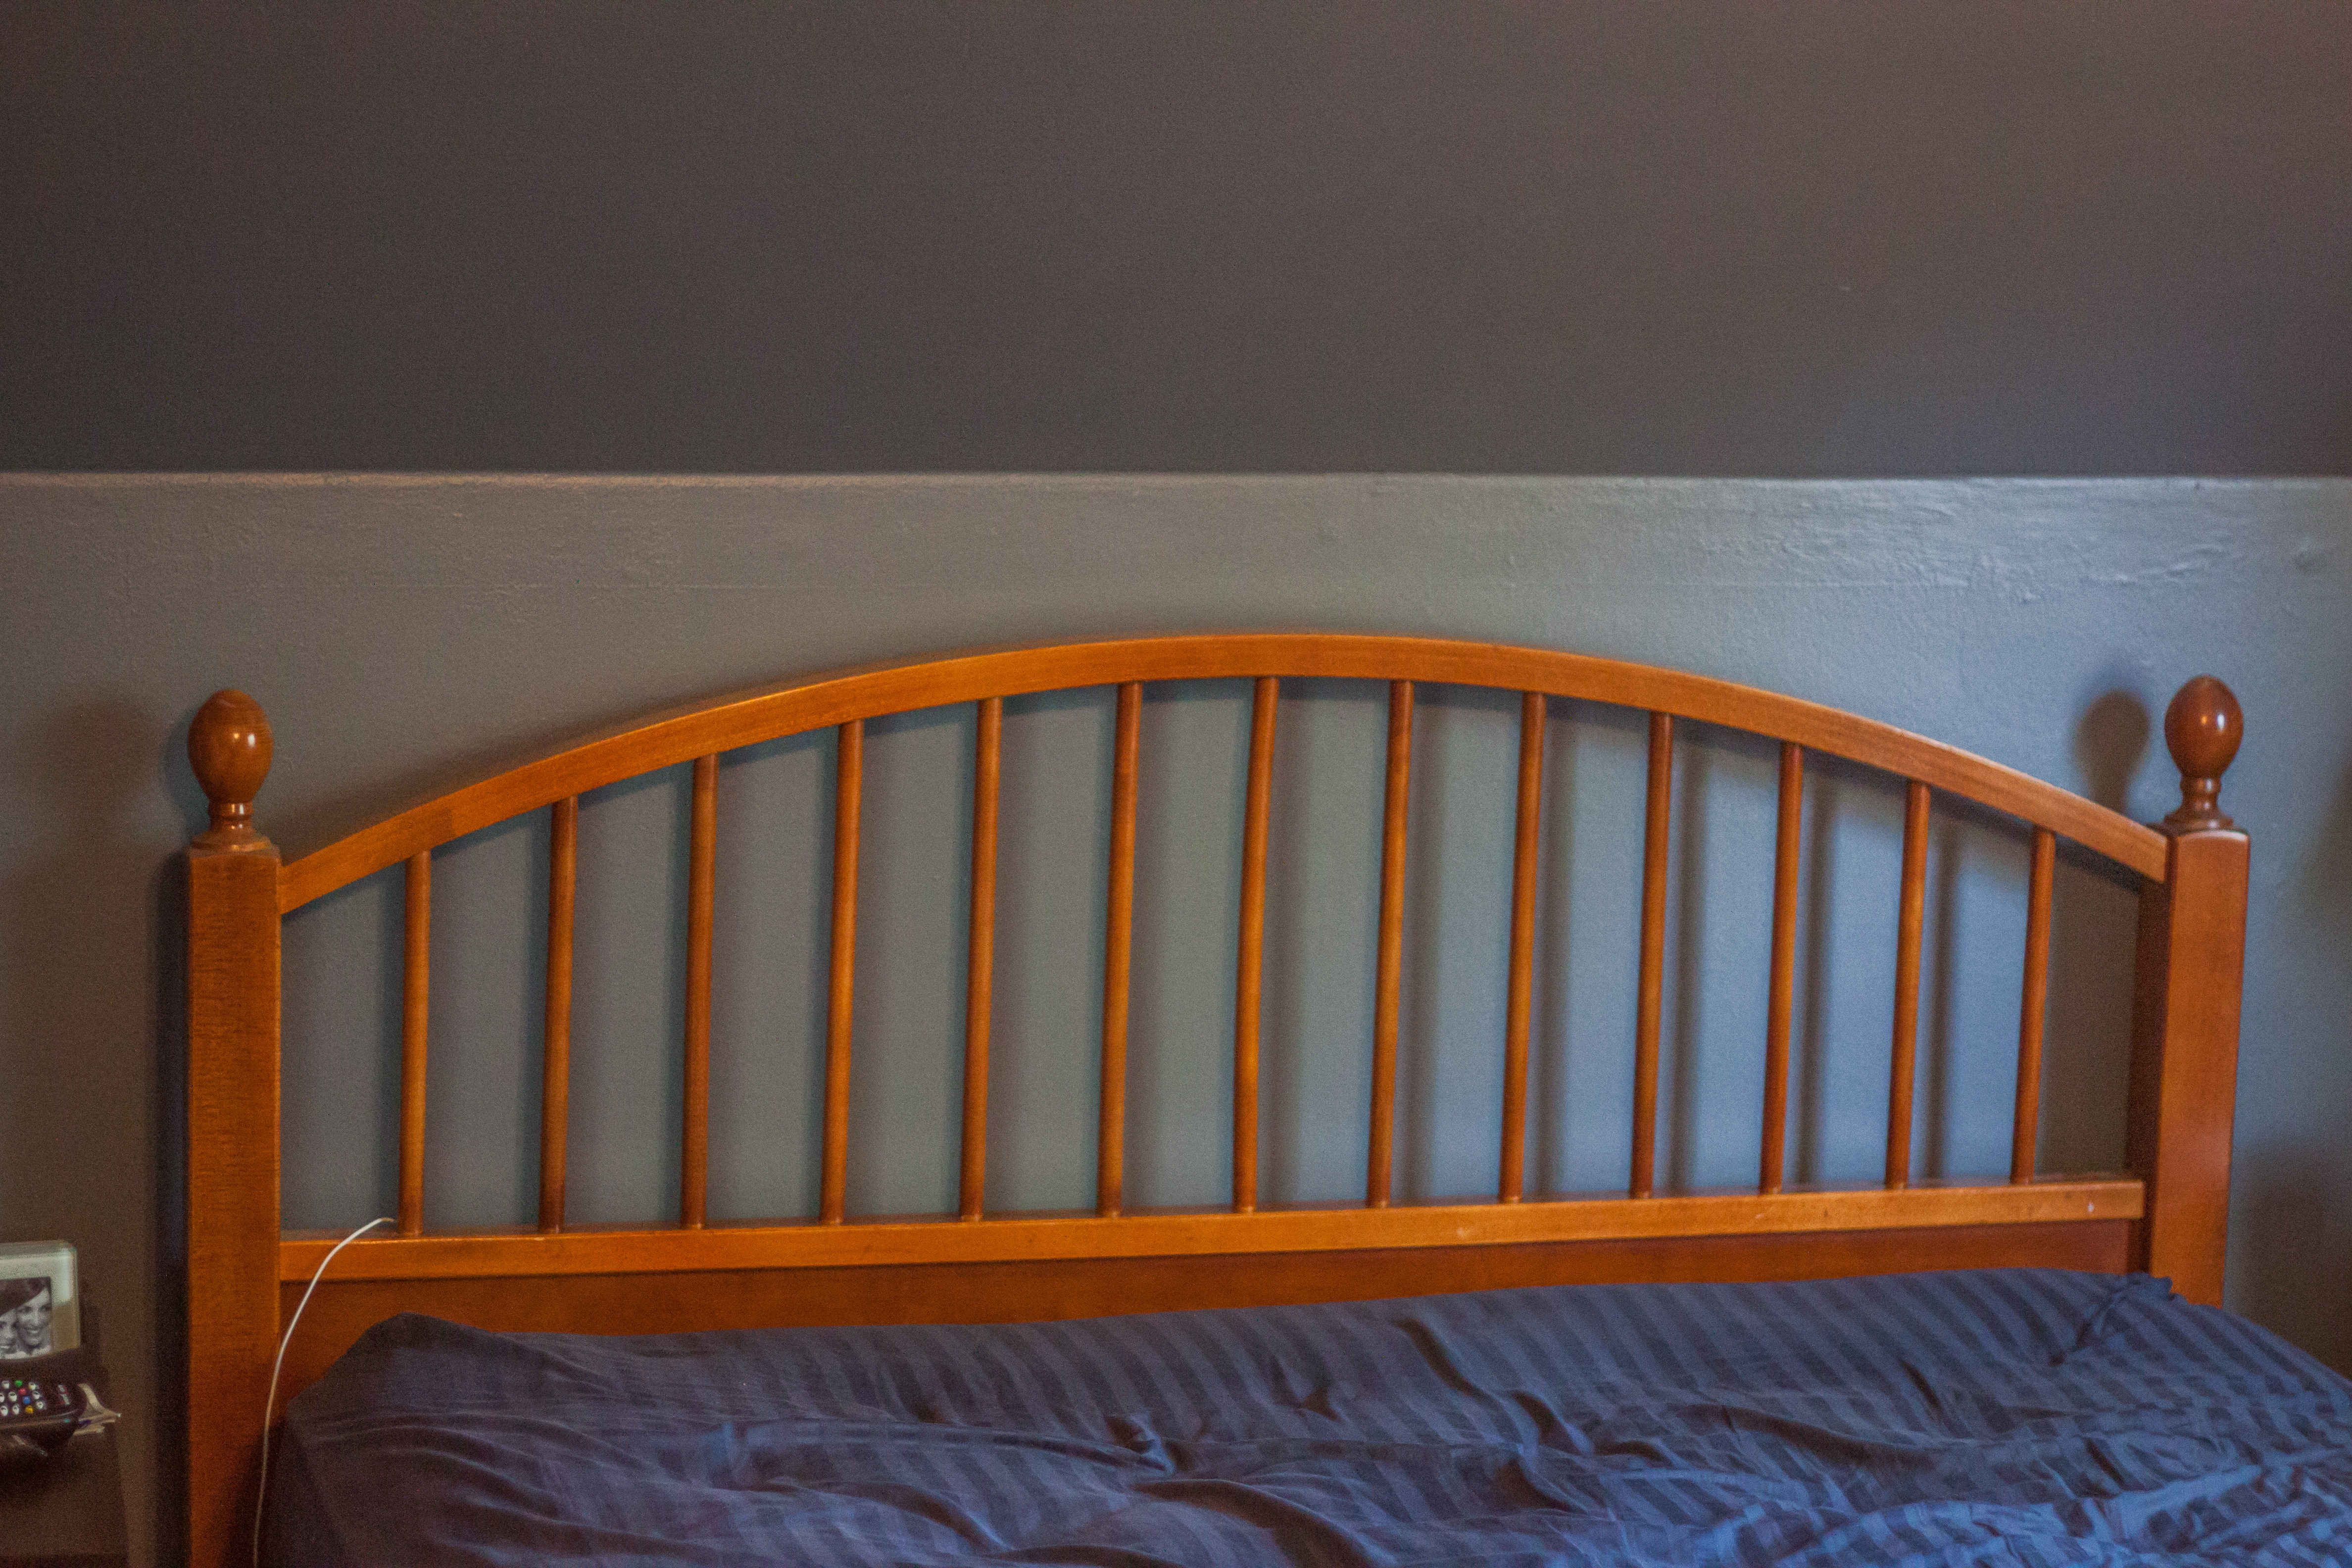
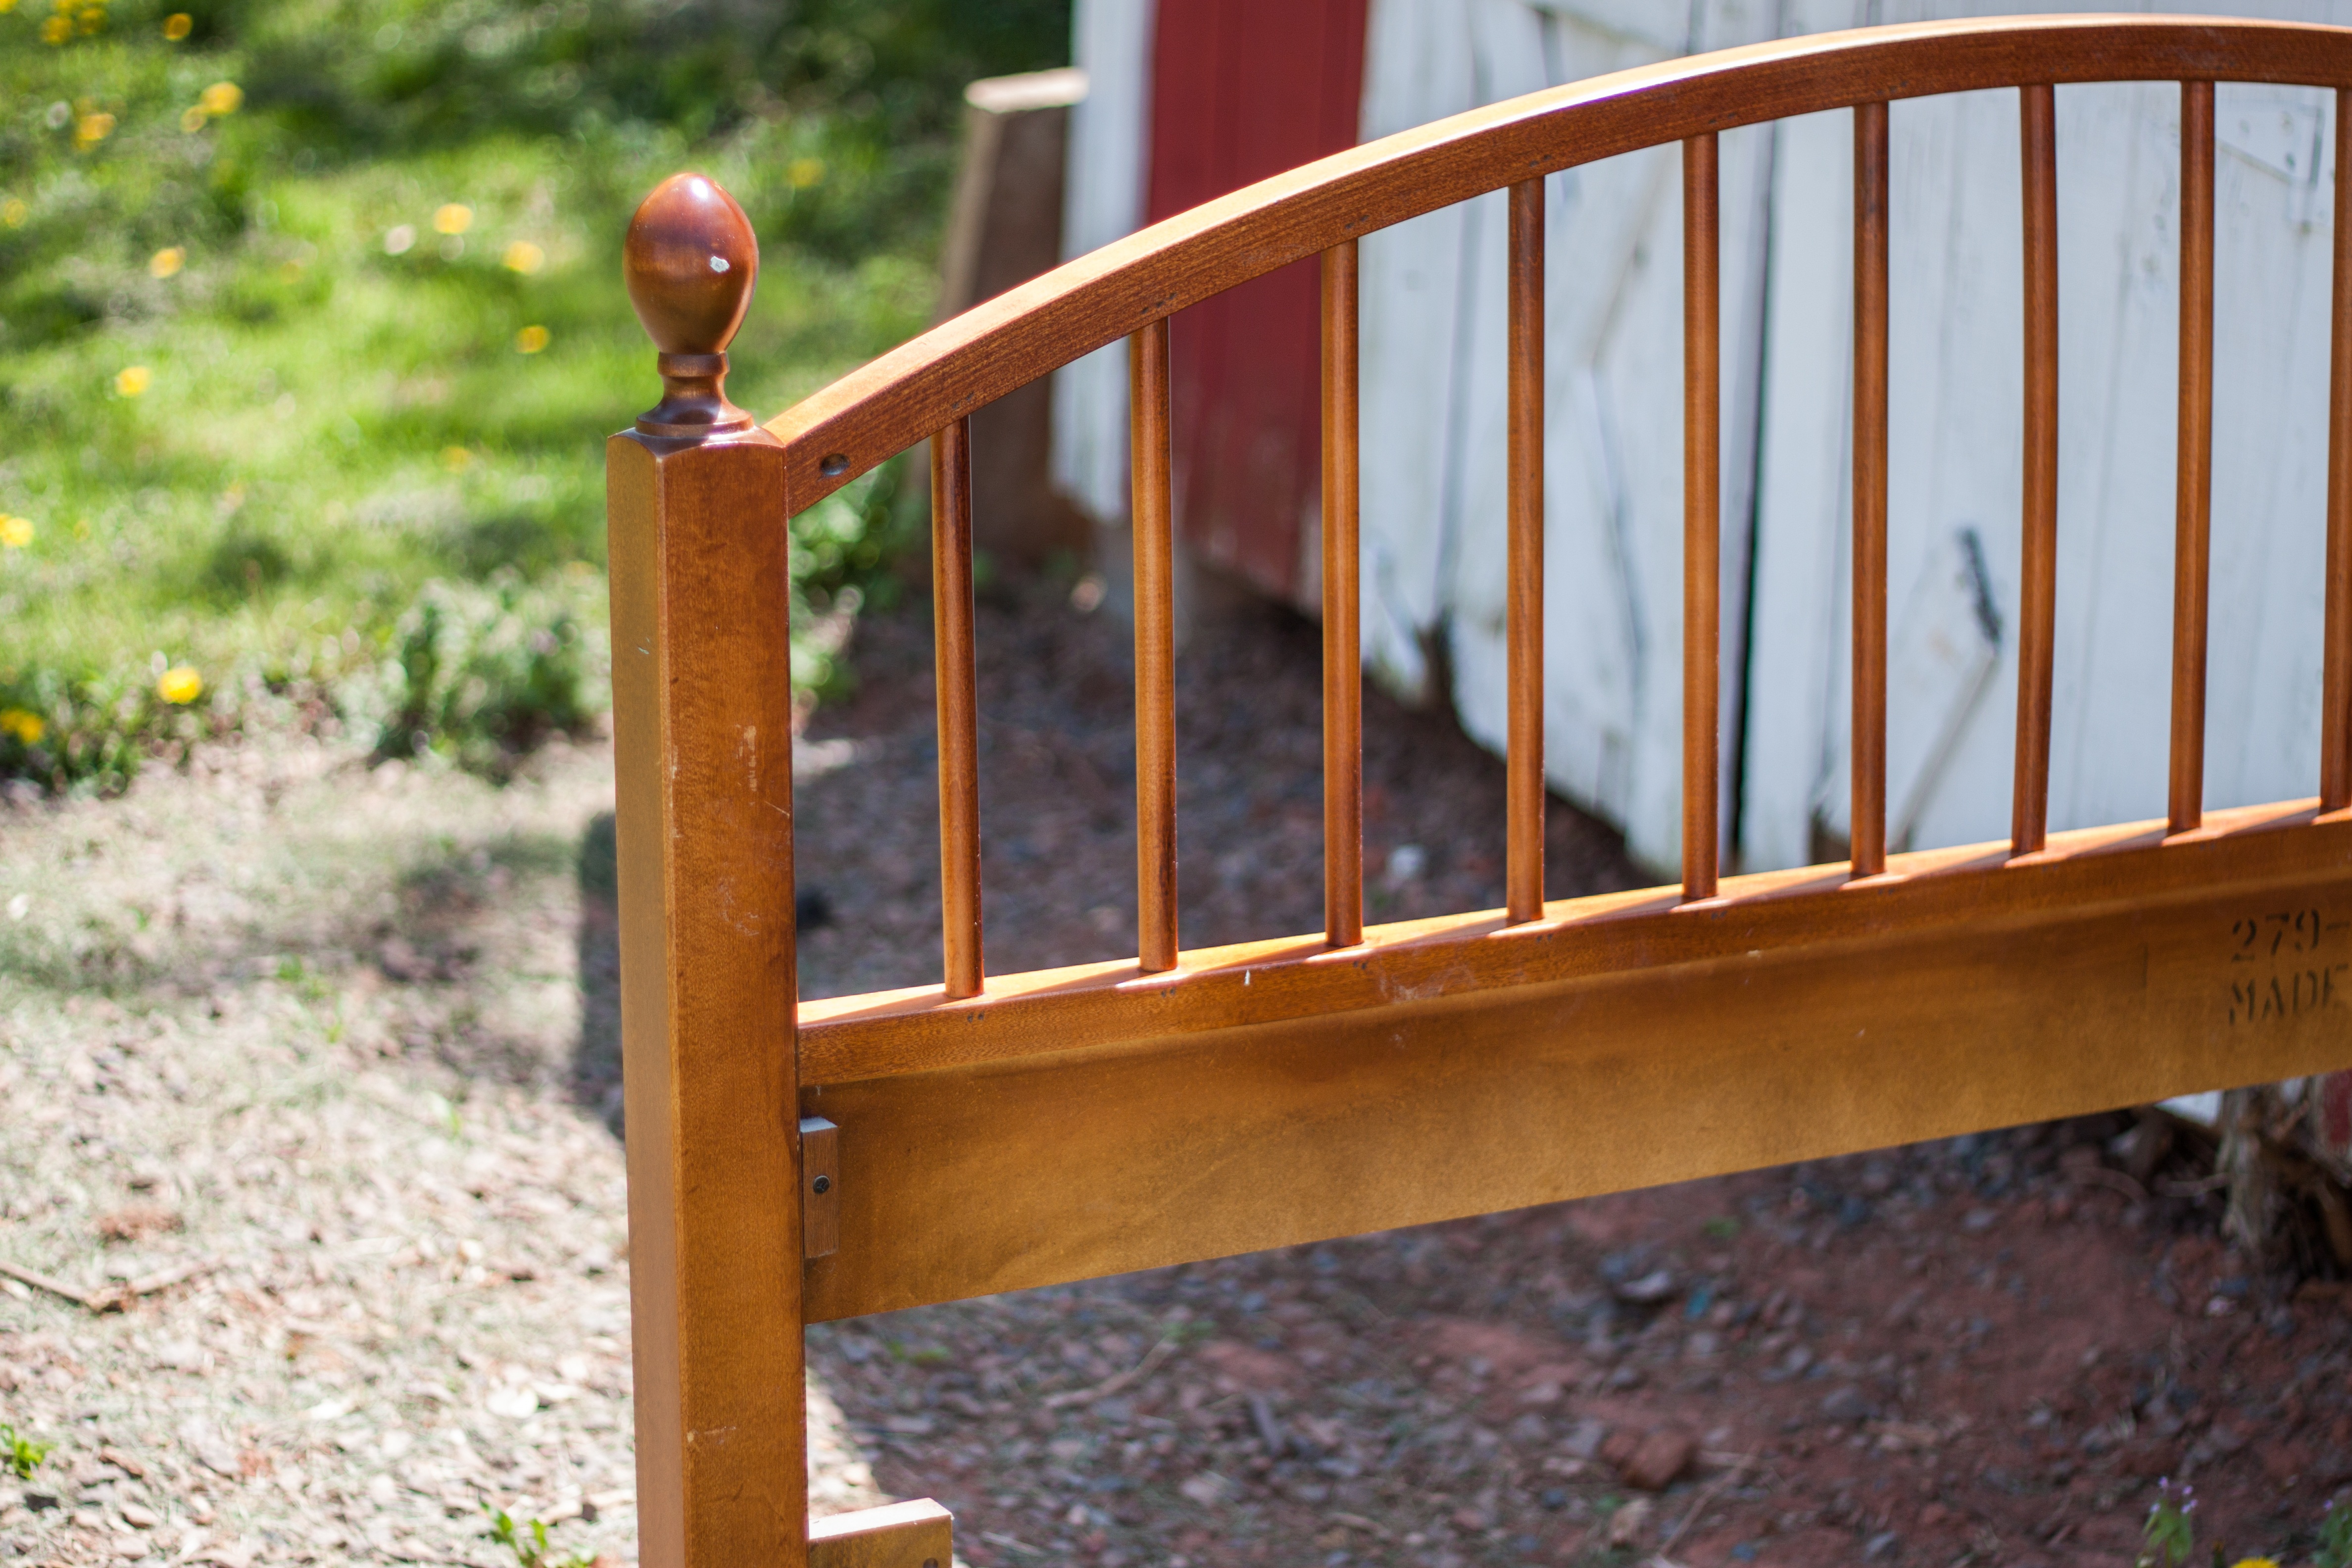
A plain, old wood headboard. The rest of our bedroom furniture is a black/brown color from Ikea so this was not going to do. Our walls are a lovely blue/gray color and our curtains have gray and yellow in them. So the idea I came up with was to spray paint the spindles a yellow color and then spray paint the rest of the headboard the black color. So we started off by spraying the spindles the yellow color.

Headboard-2

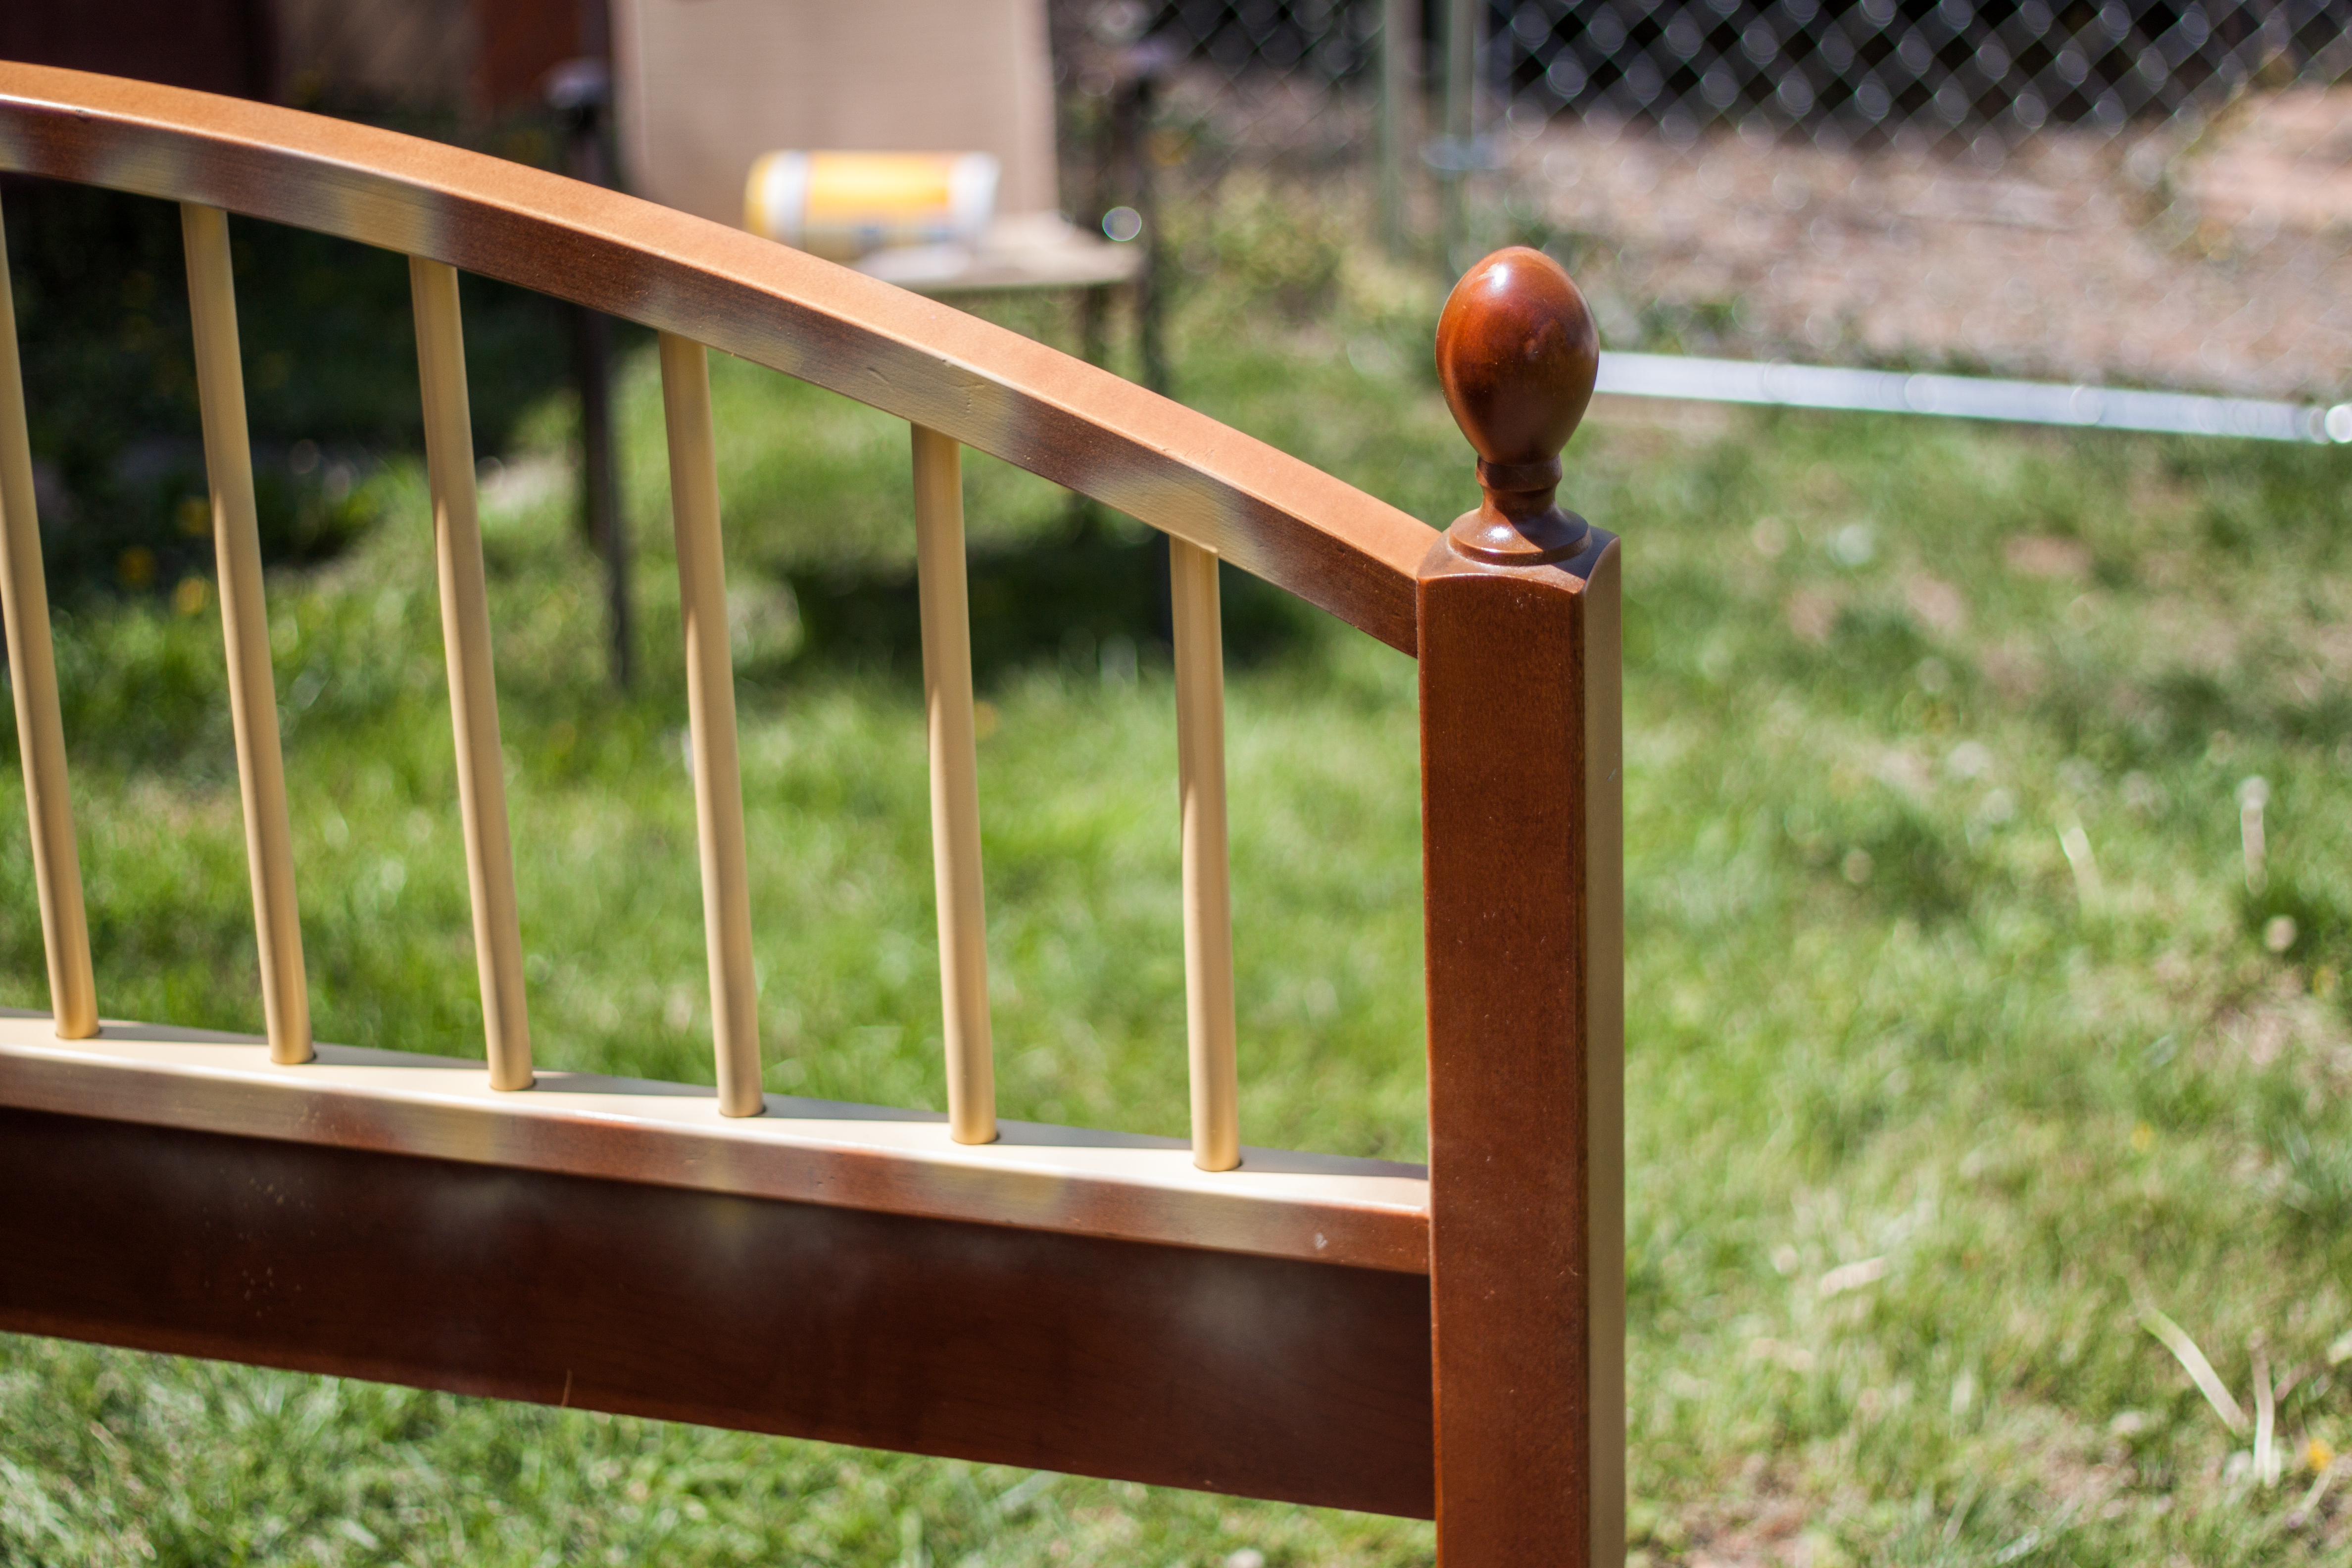
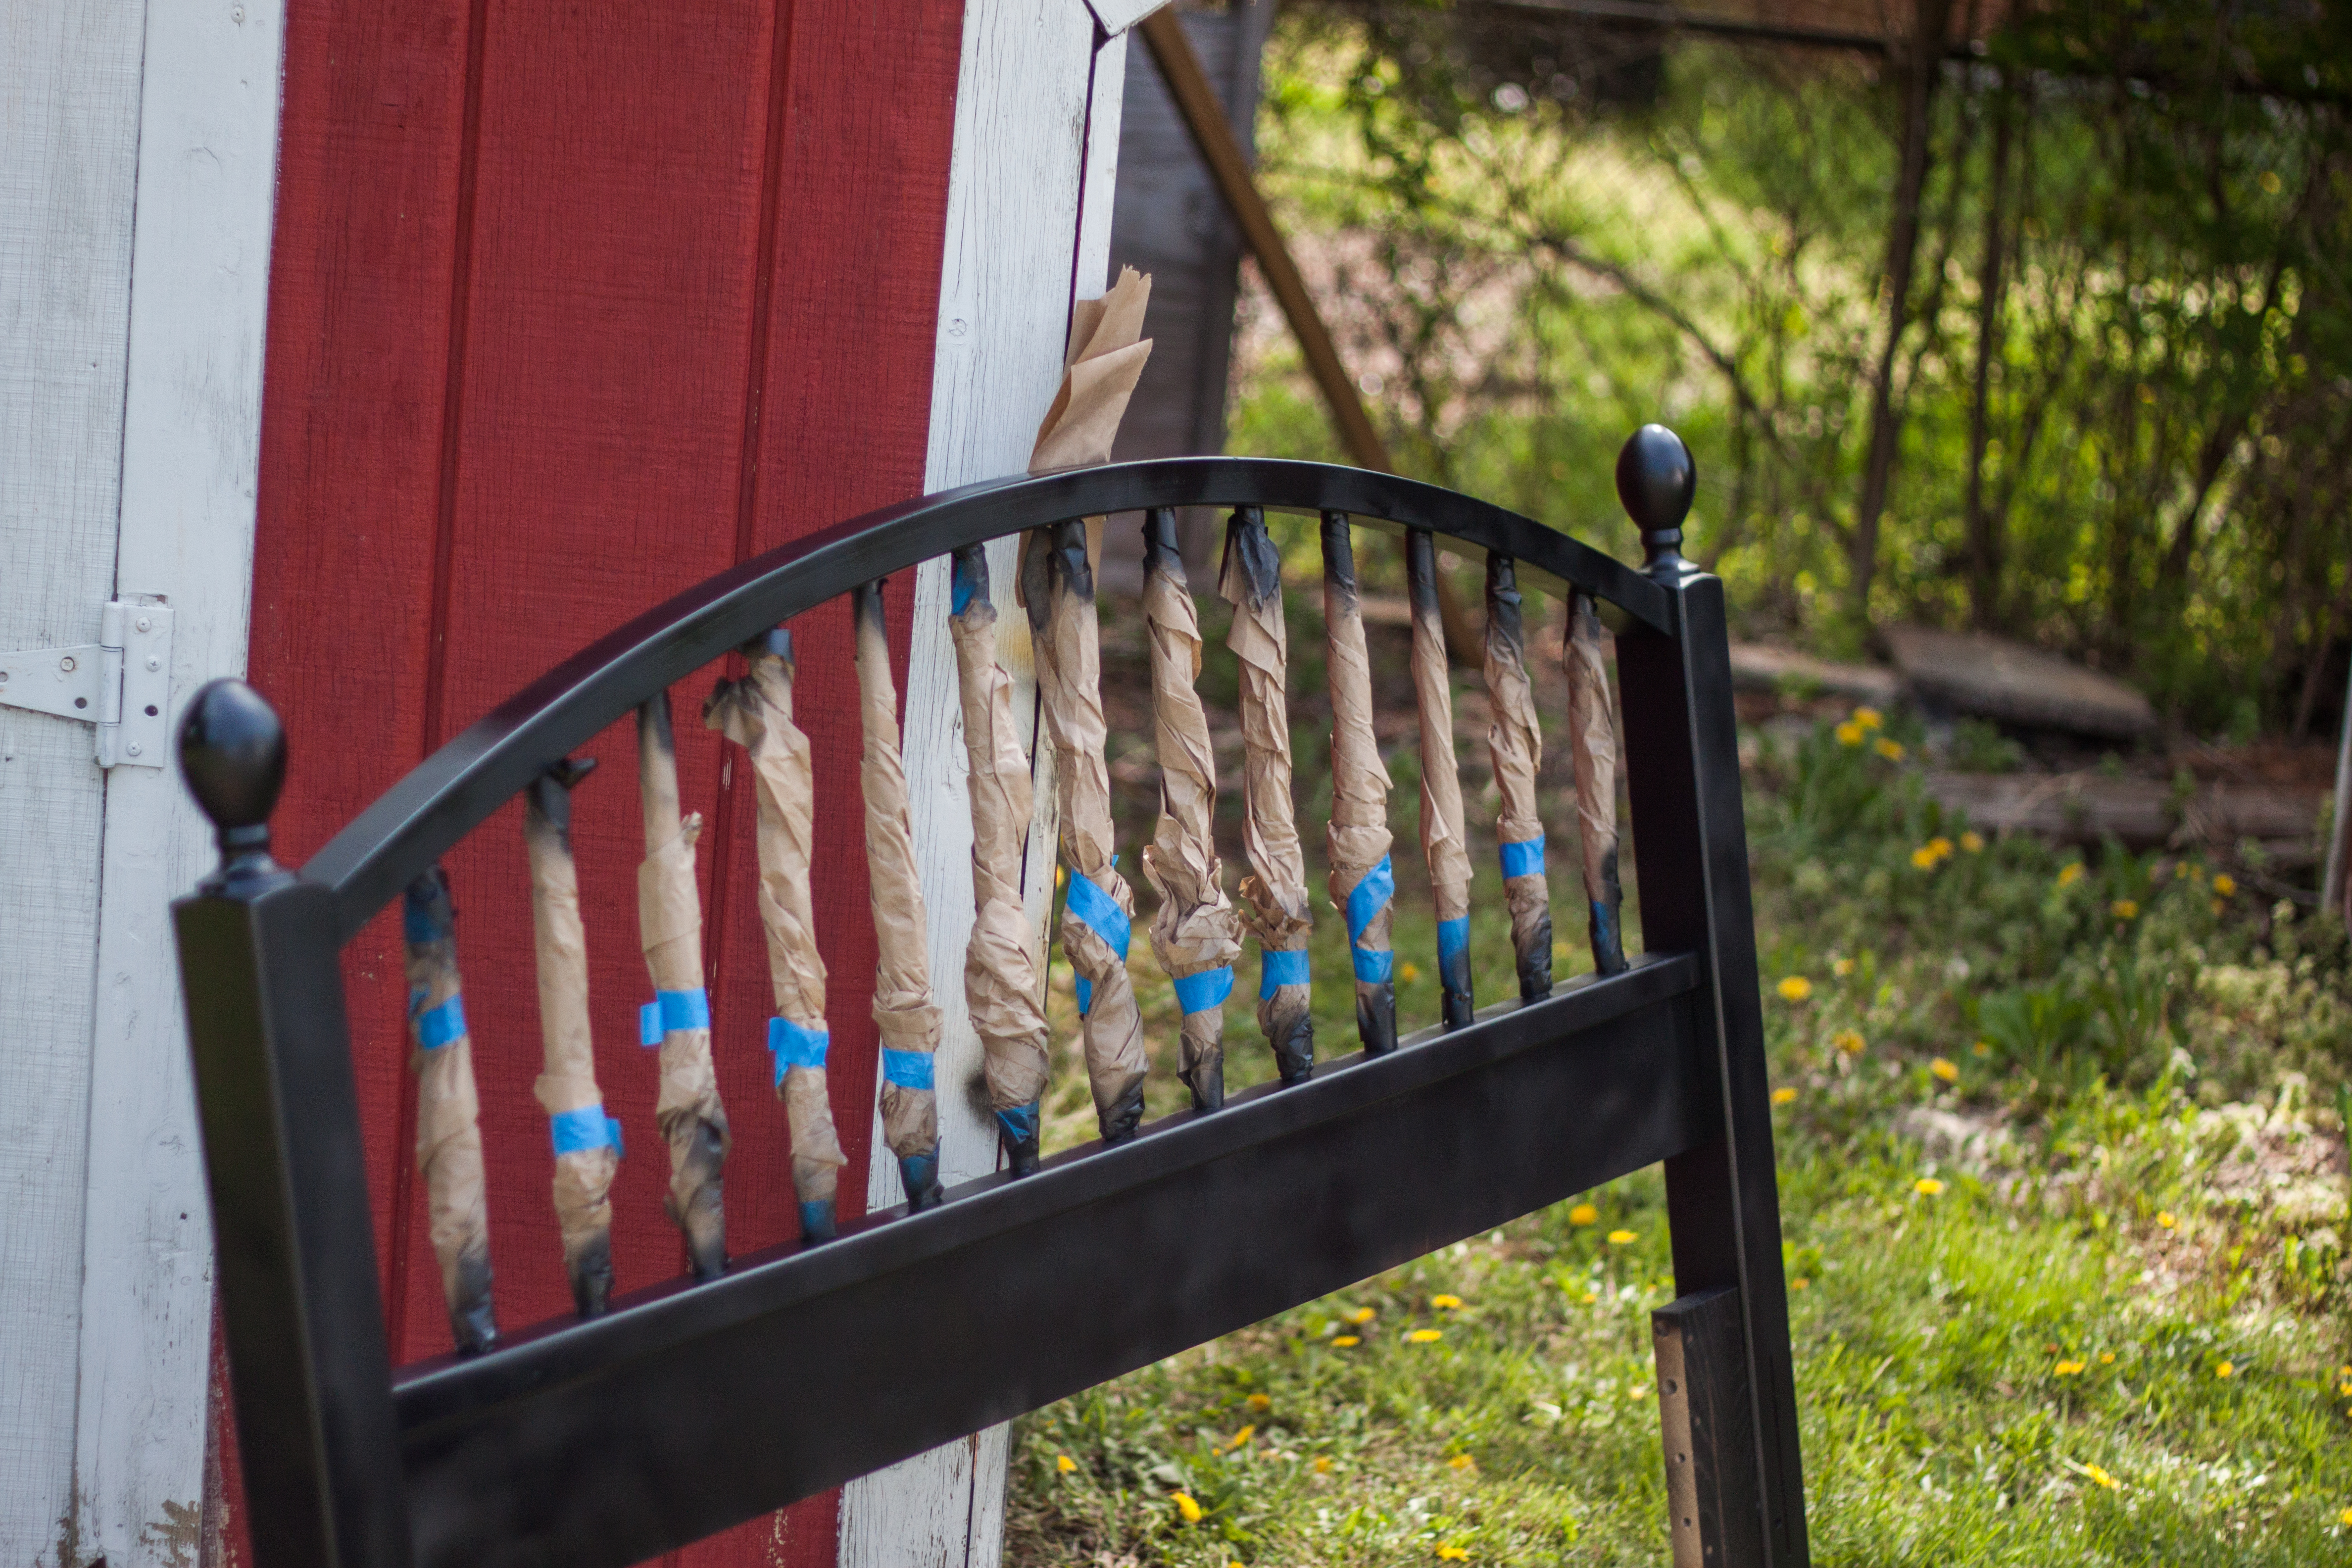
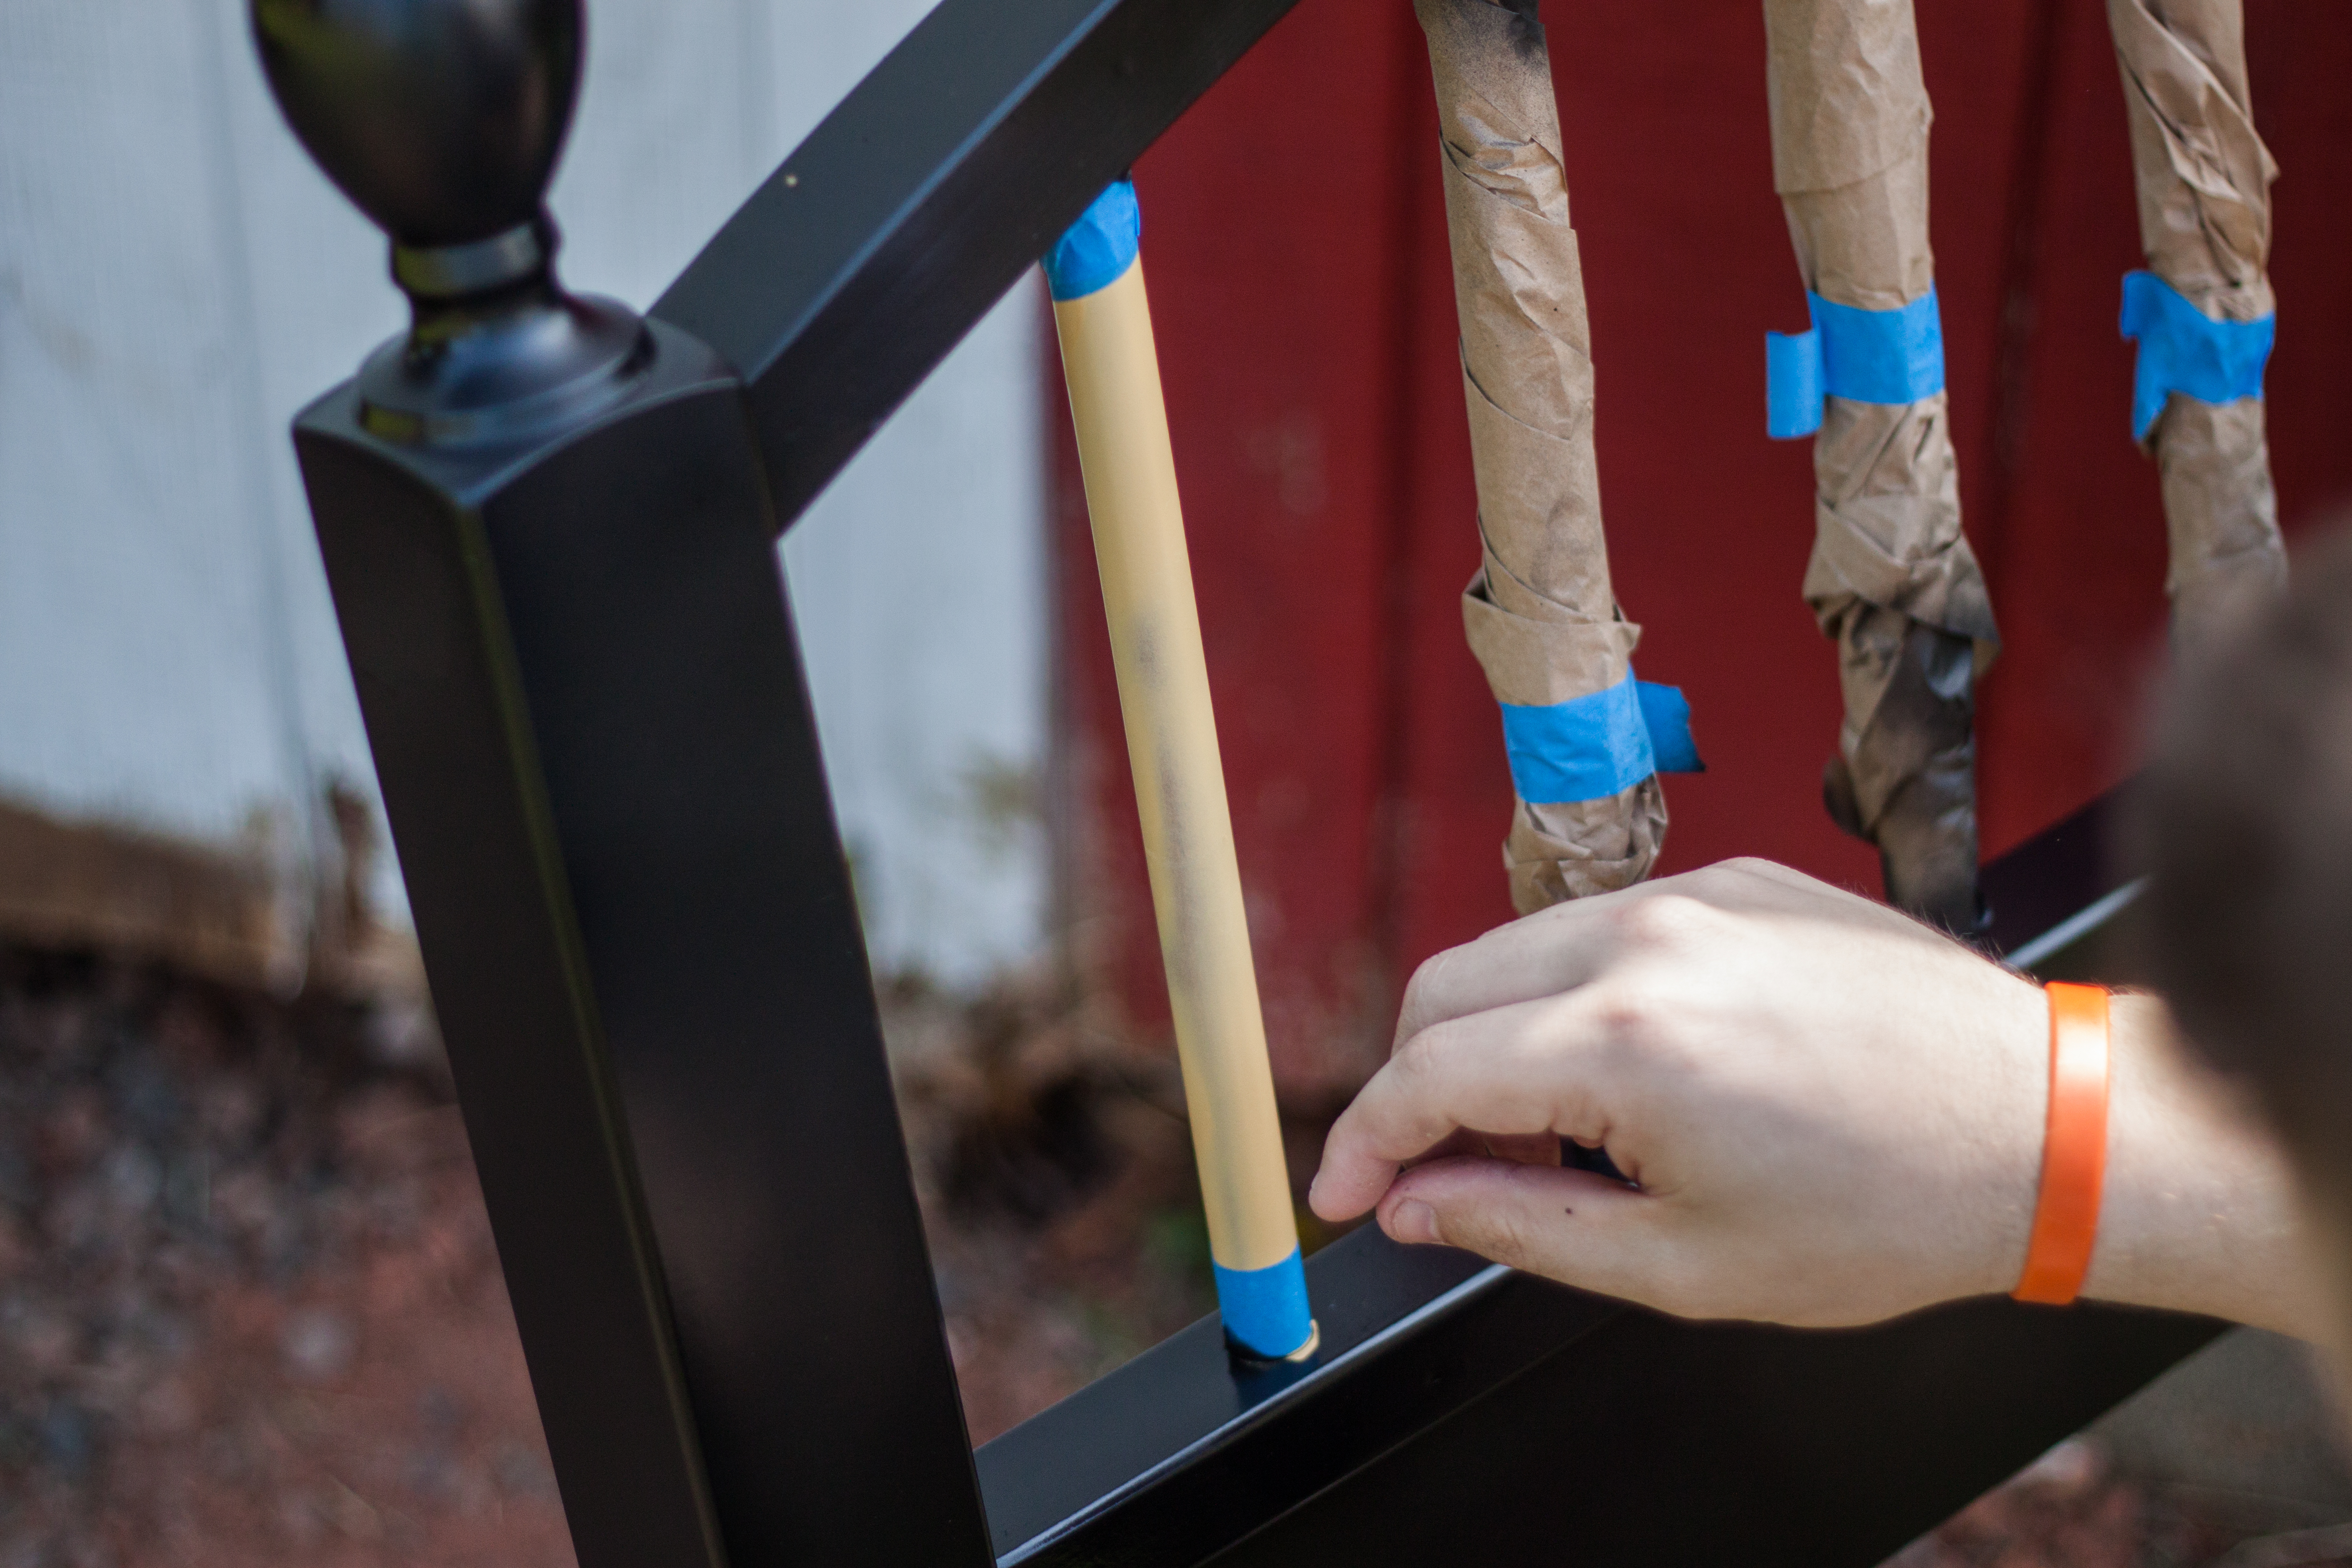
After we had them painted, Tyler taped around the tops and bottoms and then took masking paper and wrapped it around the spindles and secured it with more tape.

Headboard-3

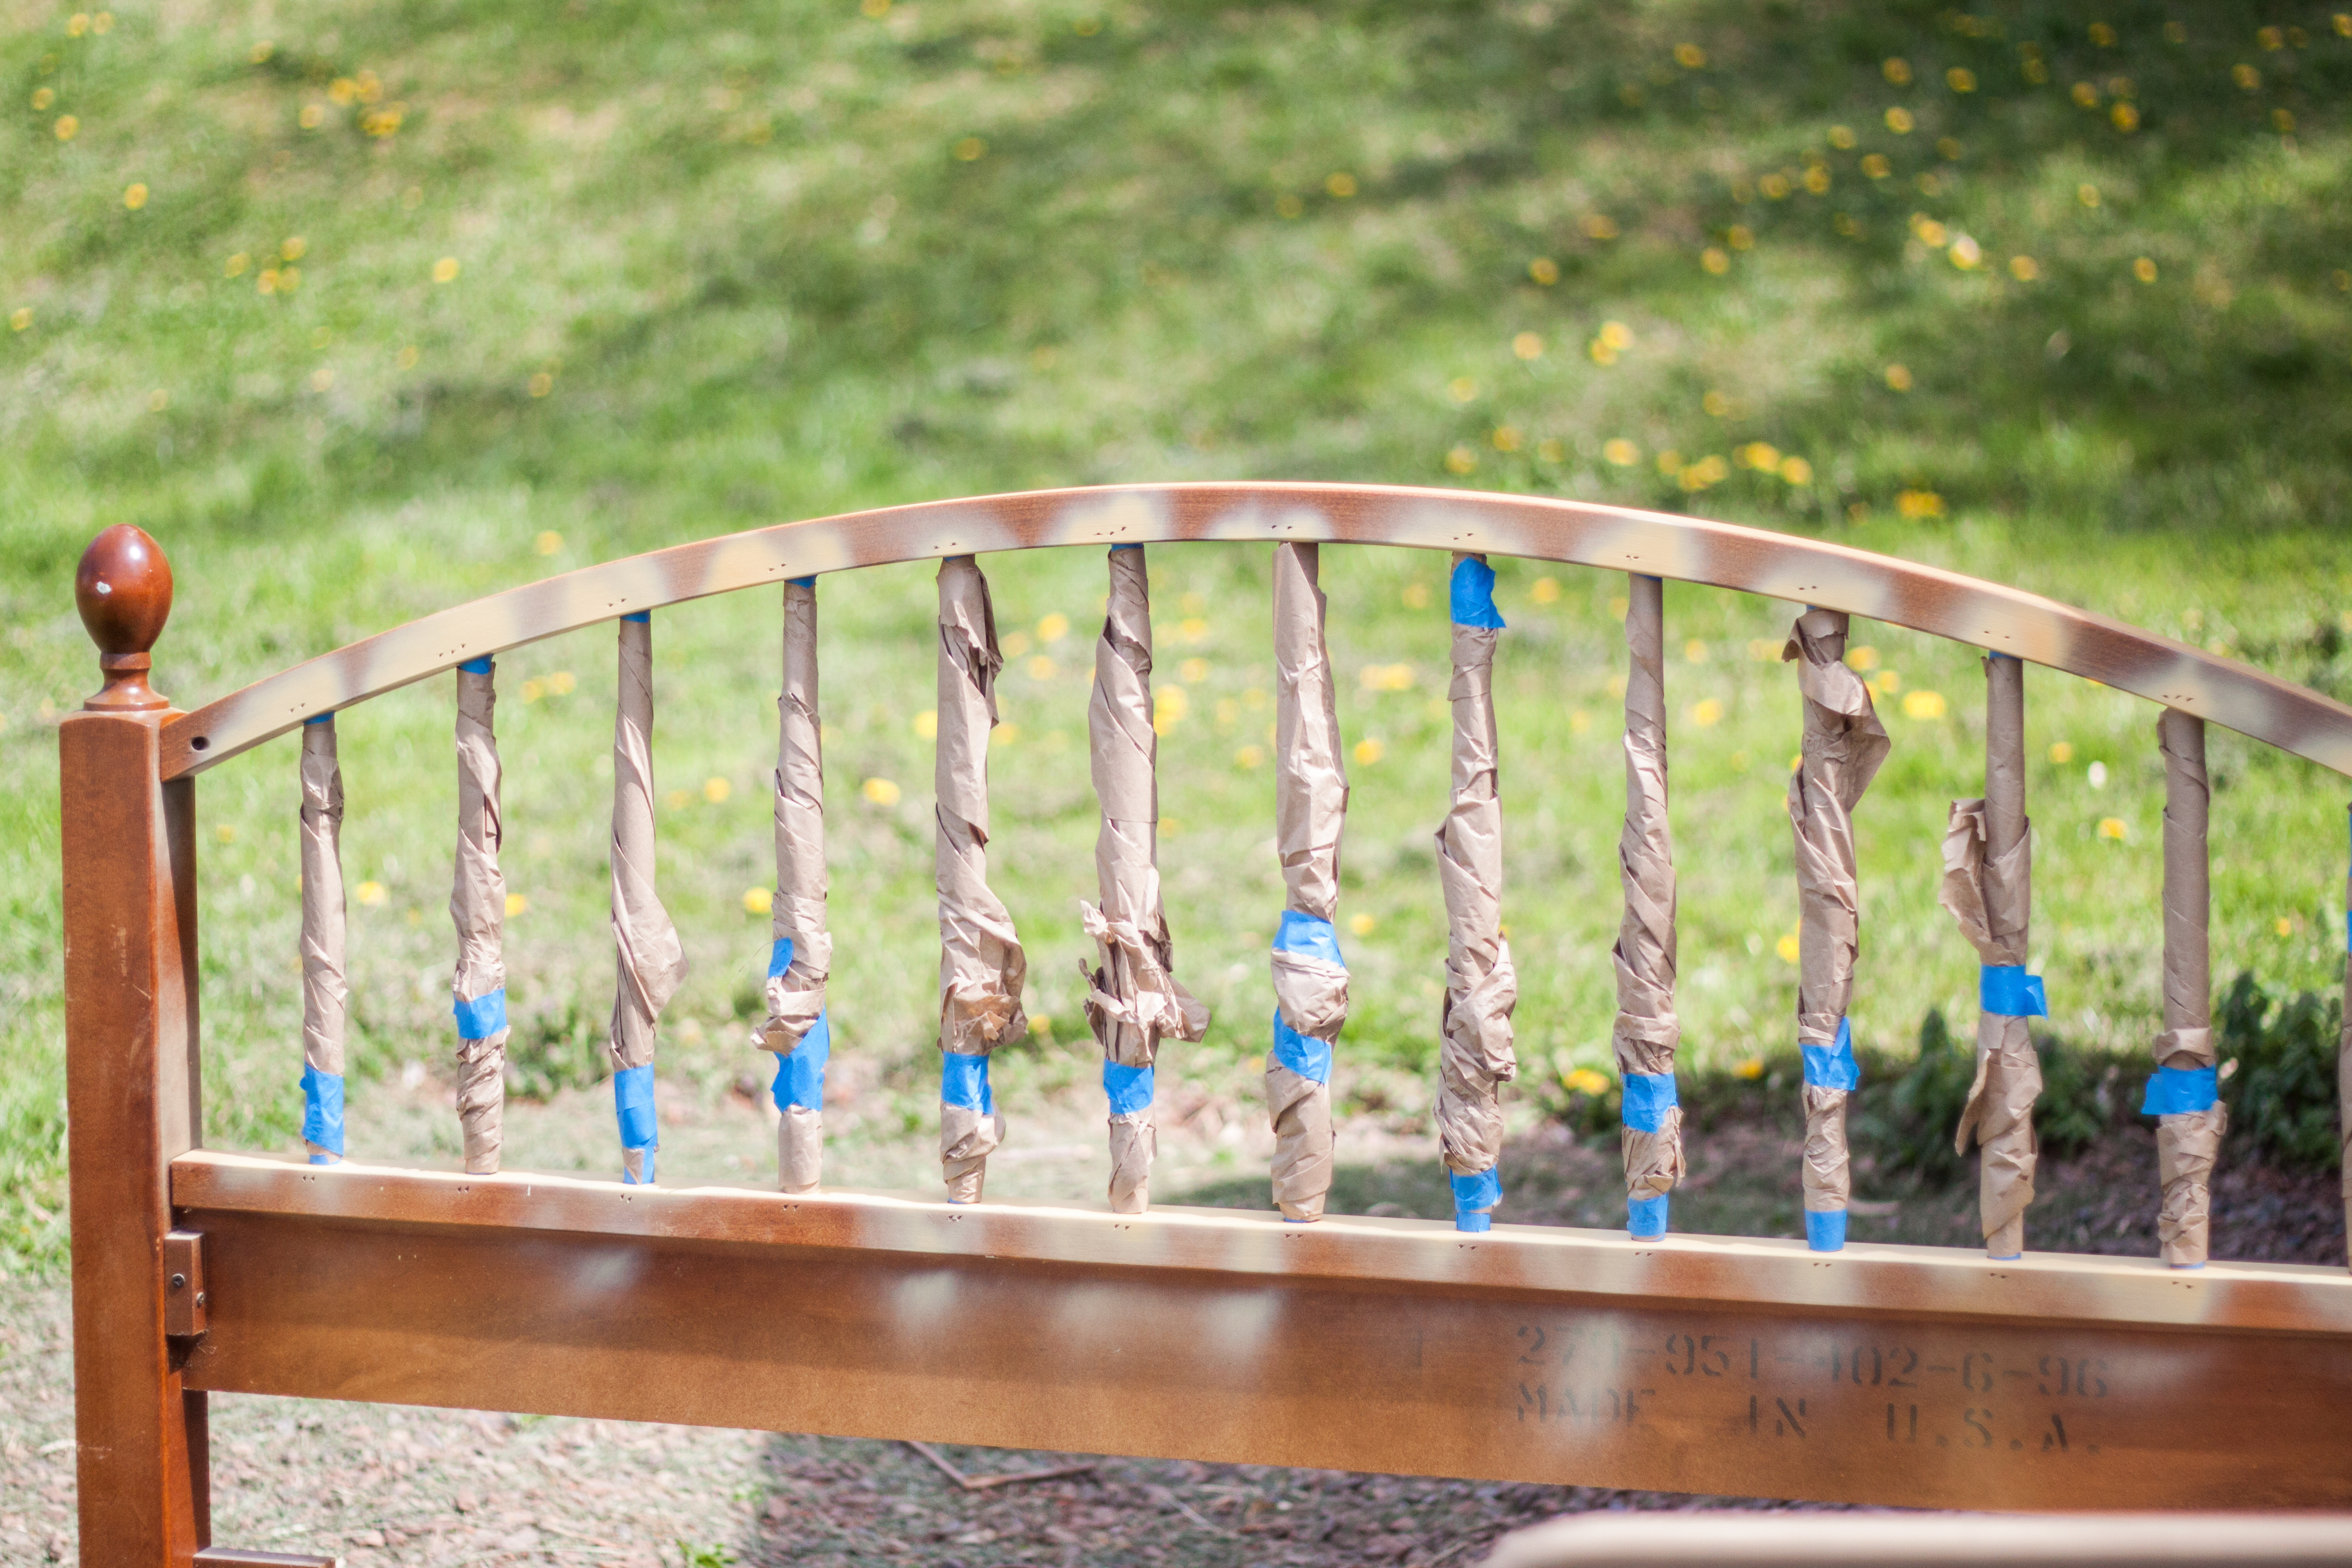
We then proceeded to spray paint the rest of the headboard in the black color.

Headboard-4

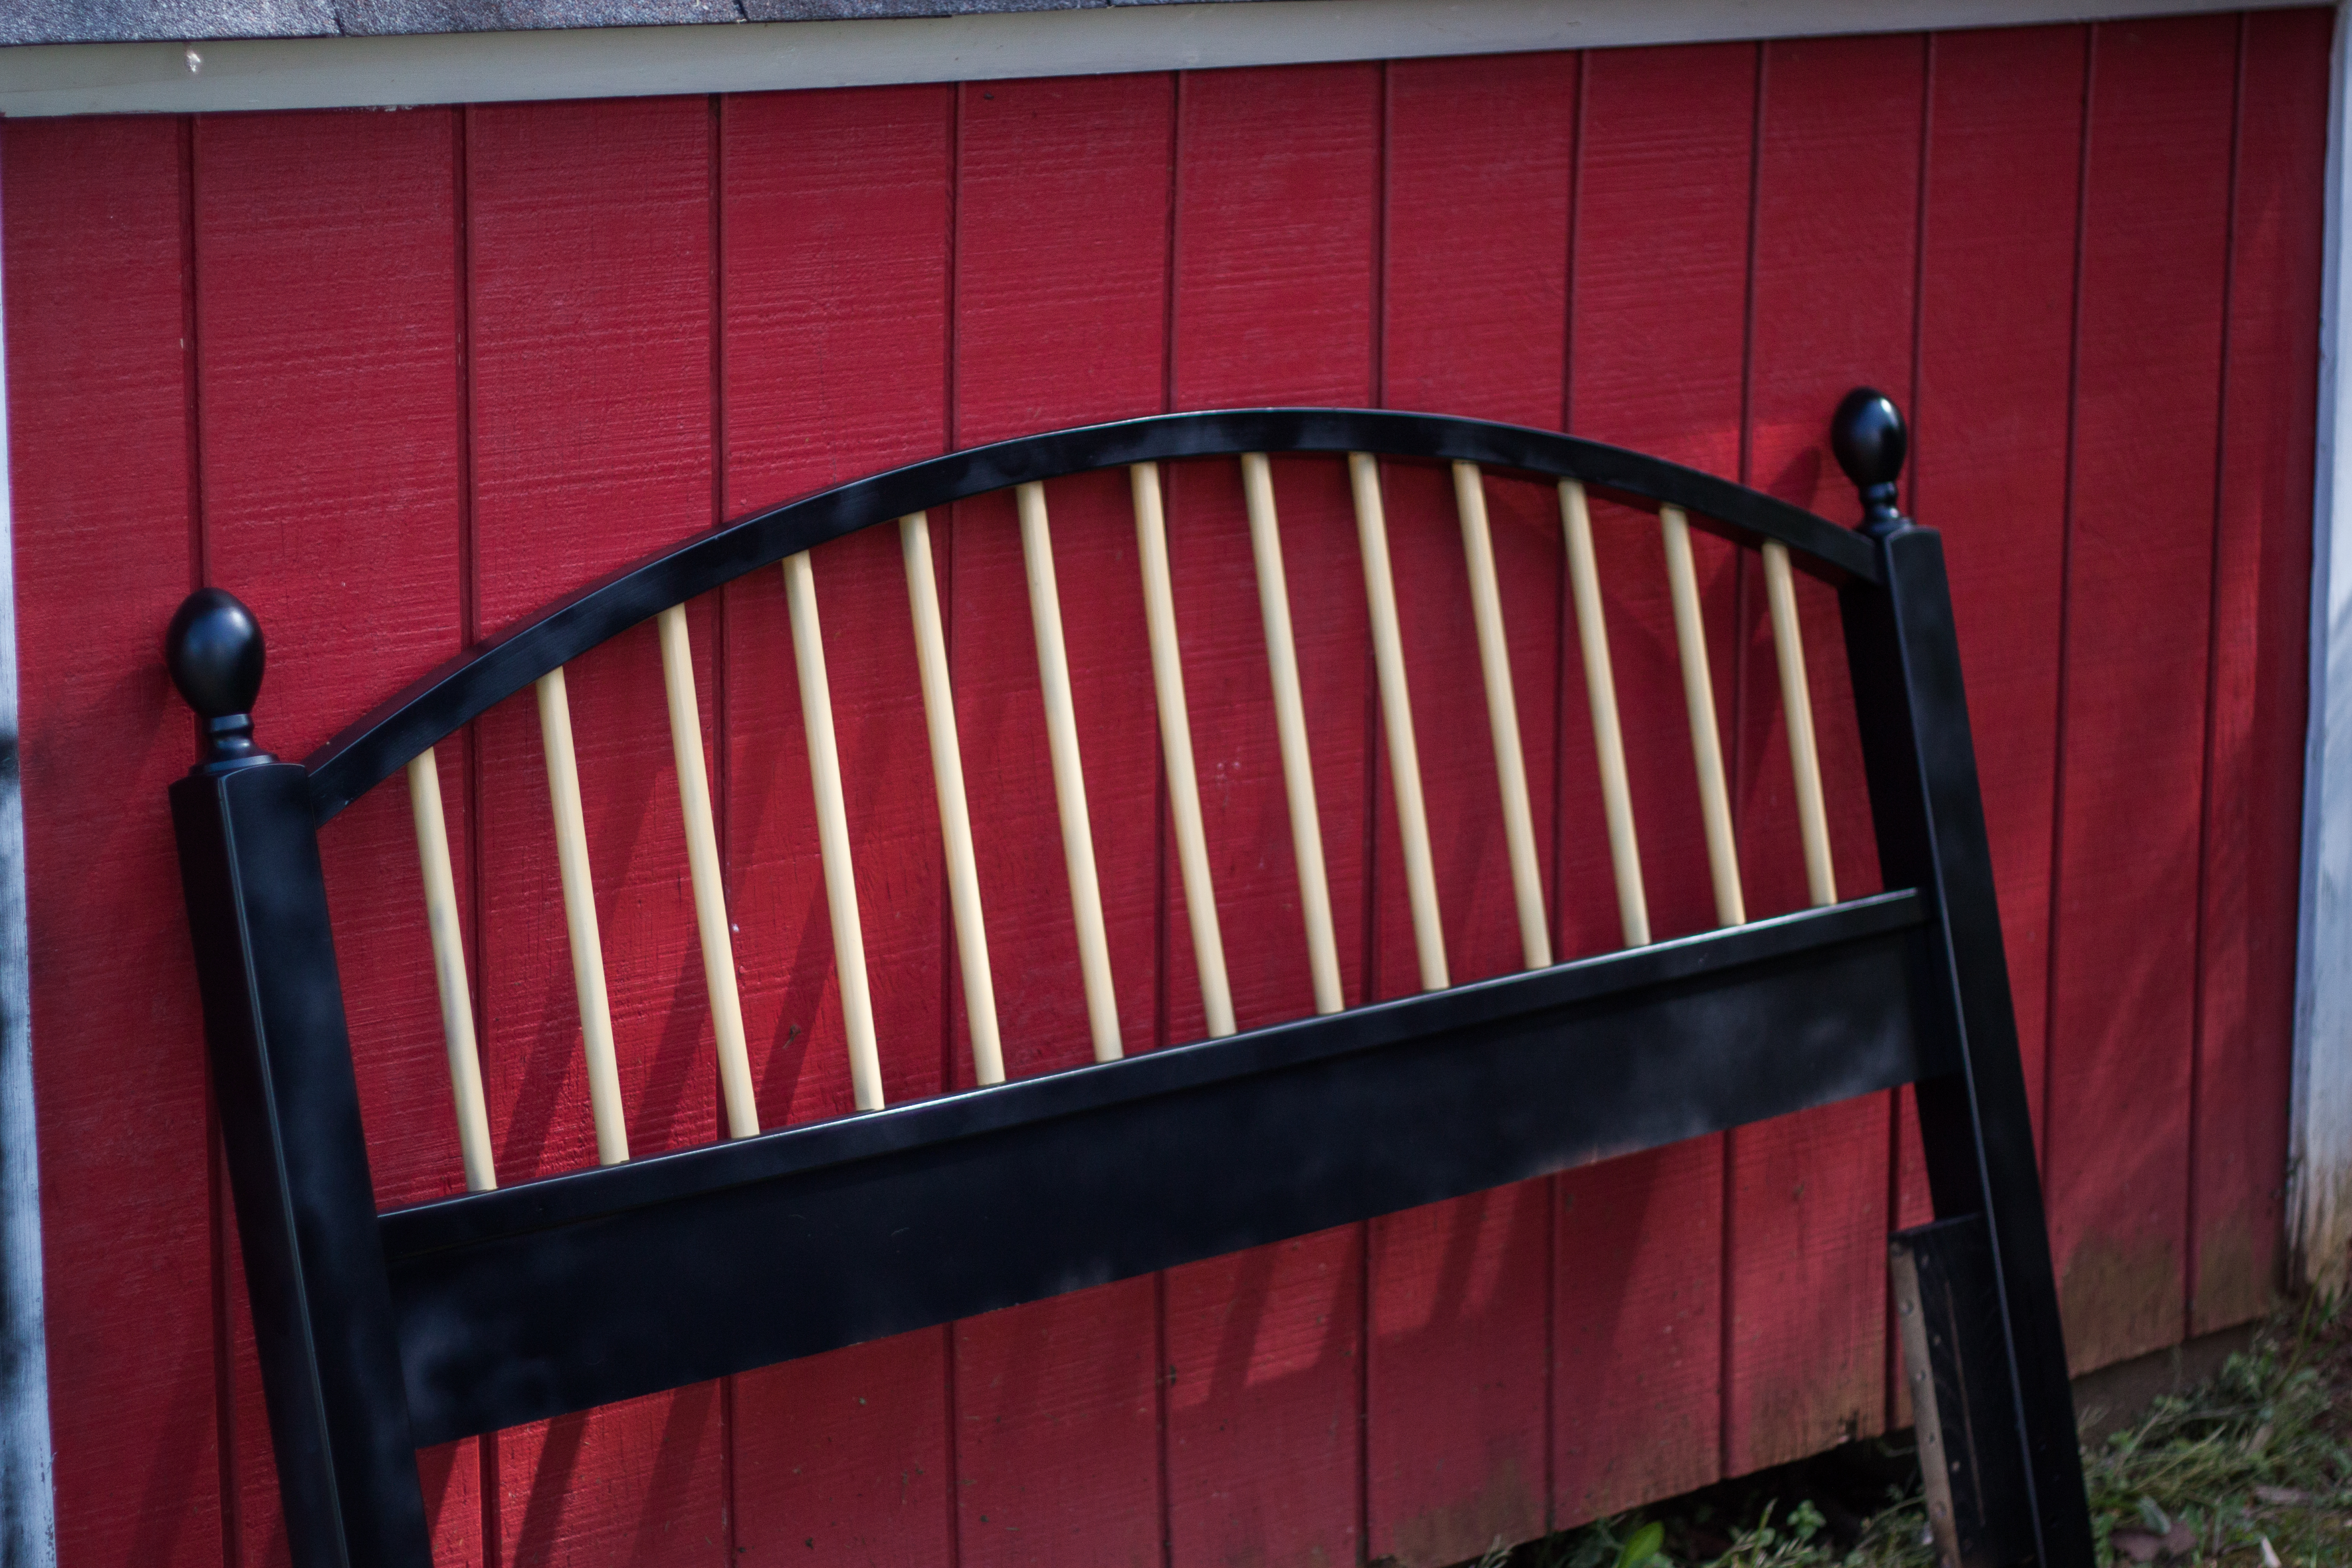
Don’t you already love the look of it? So exciting. Then we had to wait for it to dry which is always the hardest part. Once it was dry we began to carefully remove the paper and tape.

Headboard-5Headboard-6

Isn’t it looking lovely? You can see a little bit of the wood but that is the back so we weren’t too worried about that/

Headboard-7

And here is the final product, isn’t it beautiful!! I am in love with this project. It has completed our bedroom and it looks so good!

Headboard-1Bedroom-3

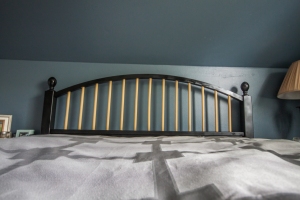
Here they are side by side, before and after of the headboard. Don’t you love the difference? Such an easy project and it made such a big difference in the room. All we needed was 4 cans of Valspar spray paint with primer, paint tape and masking paper. A lot cheaper than buying a whole new headboard.

Spring Clean Out-Step 1

Ok so who does spring cleaning? I have never done a true spring cleaning but I have also never had my own house. So maybe it’s this warm weather but I am feeling inspired to clean out the house. Like majorly because we need to maximize the small amount of space that we have. I need to follow my Aunt Kellie’s rule and get rid of stuff I have not touched in a year and organize the stuff I do use. Easier said than done. This is going to be a process but last night while Tyler was at softball practice I made my first efforts.

Step 1: Clean out drawers, closet and switch out winter to summer clothes (because it’s finally WARM!)

I feel like thats a pretty basic step and I try to do it more than just once a year but my drawers were a mess so I cleaned them out and tried to put clothes I don’t wear in a bag for goodwill. Unfortunately I seem to have an emotional attachment to like half my clothes, I will be working on that. I just had a phone conversation with my Aunt Kellie while in the process of writing this post and I’m feeling inspired so I better go straight home and throw out those clothes fast.

Step 2 is going to be to organize all my stuff that needs to be in the storage area and get it in there.

Our guest bedroom has become a throw all place. Everything goes in there and it’s such a cute room but it’s cluttered with after christmas sale decorations, winter clothes, shoes and more. So my next step is to get that room into shape and get the proper things into storage.

Maximizing the space I have. That is my goal. Please let me know any tips you have for living in a small space with too much stuff, other than the obvious one which is let go of your emotional attachments and throw  it all out! But I mean I can’t throw out all my christmas decor and such, so it’s going to be all about organization and structure! Here we go!

Entry-Way Bench Redone!

So this is something I have been wanting to change for so long. It is the bench that sits at our back entry way right off the kitchen. It was ugly wood and didn’t match the kitchen and it had this awful cushion on it that I really should have thrown out earlier but just never had. We use it for storage, I got a basket to go on it earlier to put all of our gloves and scarves in but now it is sunglasses and random stuff because todays high is 81!!! So my plan was to paint this bench. We made a trip to Lowe’s on Saturday and after much looking we settled on spray paint. We picked a dark red color to match our kitchen curtains. We got Valspar spray paint with Primer + Paint.

20130408-102434.jpg

On Sunday we decided to get out there and spray paint the bench even though we wanted to be lazy and I am so glad we did. It was so easy, like crazy easy. We took the bench outside and Tyler wiped it down to clean it off. Then we both grabbed a can of spray paint and just started spraying. We did one coat. We sprayed and watched it for spots that needed more. Once it looked to be all done we let it dry for about an hour or so. We just left it in the backyard and went on our way. Tyler then went out to check it and it was dry and looked great! He just had to flip it over to finish off the bottoms of the legs and underneath it.

20130408-102441.jpg

And then viola we have a brand new bench in our entry way! It looks so much better, it matches the kitchen now and really adds a pop of color to the entry way. I am already planning other pieces of furniture we have that are hand-me-downs that I want to go at with the spray paint. I’m not sure how well it will do as far as not getting scratched off but for the bench it was great because we don’t use it that much just for storage. I will keep y’all updated as to if it stays well. But for now it looks beautiful and it only took two cans of spray paint and they weren’t even both empty. Such an inexpensive improvement to our entry-way!

20130408-102456.jpg

Do you have any furniture you have painted and remade? Let us know, we love to hear your stories or let us know if you try this out on some of your old furniture!

20130408-102501.jpg