DIY Old to New Headboard

This weekend we embarked on one of our most exciting projects to date and this one did not disappoint. We have been slowly redoing our bedroom, look out for a post of the finished project later this week. Our last major step was our headboard. We have replaced all of the other furniture in the room or added new furniture where needed. Our headboard was the only piece that we felt was worth saving and redoing so we didn’t have to spend a couple hundred dollars on a new one that matched our bedroom set. So one night I came up with an idea, it seemed a bit difficult but we decided it could be done. After our bench spray painting success we decided to embark on another project.

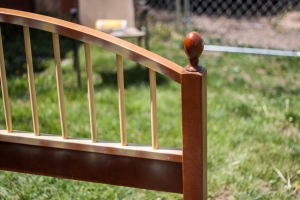
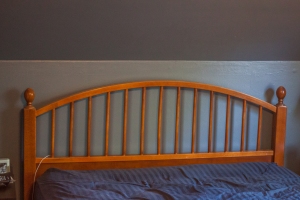
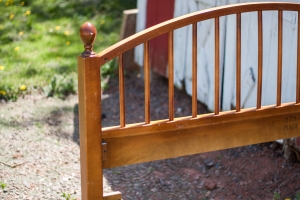
So we started with this

Headboard-1Headboard-8

A plain, old wood headboard. The rest of our bedroom furniture is a black/brown color from Ikea so this was not going to do. Our walls are a lovely blue/gray color and our curtains have gray and yellow in them. So the idea I came up with was to spray paint the spindles a yellow color and then spray paint the rest of the headboard the black color. So we started off by spraying the spindles the yellow color.

Headboard-2

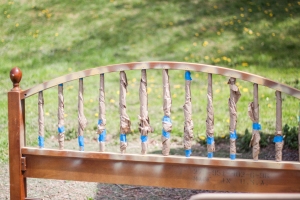
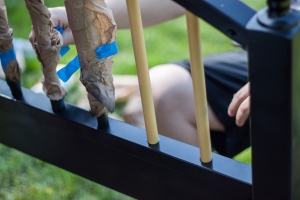
After we had them painted, Tyler taped around the tops and bottoms and then took masking paper and wrapped it around the spindles and secured it with more tape.

Headboard-3

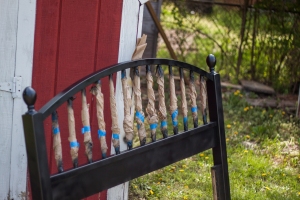
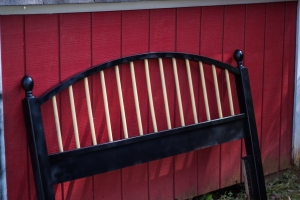
We then proceeded to spray paint the rest of the headboard in the black color.

Headboard-4

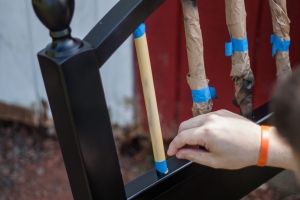
Don’t you already love the look of it? So exciting. Then we had to wait for it to dry which is always the hardest part. Once it was dry we began to carefully remove the paper and tape.

Headboard-5Headboard-6

Isn’t it looking lovely? You can see a little bit of the wood but that is the back so we weren’t too worried about that/

Headboard-7

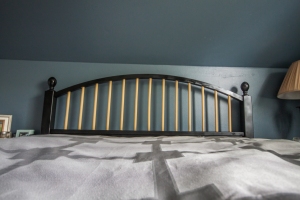
And here is the final product, isn’t it beautiful!! I am in love with this project. It has completed our bedroom and it looks so good!

Headboard-1Bedroom-3

Here they are side by side, before and after of the headboard. Don’t you love the difference? Such an easy project and it made such a big difference in the room. All we needed was 4 cans of Valspar spray paint with primer, paint tape and masking paper. A lot cheaper than buying a whole new headboard.
Wedding Thursday- DIY Centerpieces

Today I have more beautiful centerpiece ideas to share with you. These were compliments of my best friend’s wedding. Anna and Kyle had a beautiful wedding. They had an absolutely gorgeous venue and worked very hard in planning their wedding and creating lots of DIY decorations. Their wedding was proof you can have a gorgeous wedding on a small budget. The centerpieces were so cute and a great idea by Anna. They were very easy to make, all of the bridesmaids sat down and whipped them out in a couple hours.

Supplies Needed:
-Mason Jars
-Twine
-Old Books
-Candles
-Cardboard
-Chalkboard Paint
-Chalk
-Flowers (we used silk flowers)
-And the obvious, scissors, hole punch

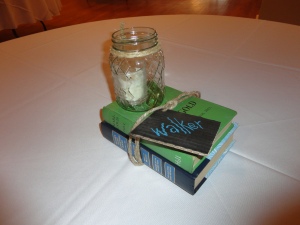
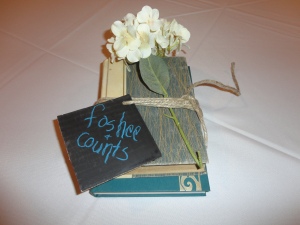
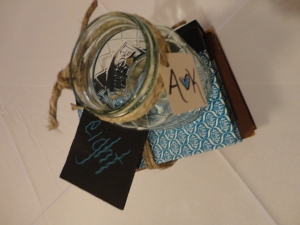
So what we did was to first stack two books on top of each other and wrapped them in twine. At the end of the twine we hole punched and added the tags for table #’s and reserved seating. The tags were made with cut out pieces of cardboard, spray the cardboard with chalkboard paint and then write on it with chalk.

DSC00519

In some of the centerpieces we used mason jars with a candle inside. We wrapped twine around the top of the mason jar and then placed the jar on top of the books and there you have it, an easy and inexpensive centerpiece.

DSC00520

Another one of the centerpieces had silk flowers stuck under the twine rather than having the mason jars. That way not every table was the same.

DSC00521

The tables that were not reserved for family were given numbers. There was no assigned seating at this wedding but numbers were needed for people to be called to the buffet table.

So now you have some easy, inexpensive and DIY centerpieces. The old books came from Anna’s mom who is a librarian and the mason jars were collected from different people who had them. That is proof that if you ask around you can find things you need and save a lot of money!

Do any of you have any inexpensive, DIY centerpieces you have done? Or will you be using this idea? Let us know if you do! It made for a truly beautiful wedding. I will be highlighting more ideas from Anna’s wedding as we continue on with Wedding Thursday, until next week!

Gift Wrapped Chicken

Oh man do I have a delicious recipe for you today! This one comes compliments of my Memaw. I had it a couple of times at her house and then just had to get the recipe from her. It is a chicken dish that is delicious, I don’t usually eat a lot of meat (I focus more on the sides) but I clean my plate with this meal.

Ingredients:
– 4 boneless, skinless chicken breasts
– 16 oz. can whole berry cranberry sauce
– 8 Tbs butter, divided
– 16 oz phyllo dough, defrosted in the refrigerator
– 1/2 cup butter, melted

Directions:
1. Cut each chicken breast in half the short way and pound each piece to lightly flatten.
2. Place one tablespoon cranberry and one tablespoon of butter on one half of chicken breast and place the other half on top, do this for all pieces
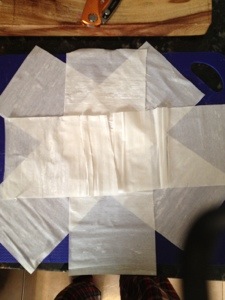
3. Cut dough in half the long way
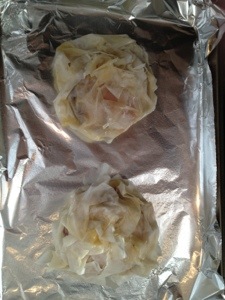
4. Stack cut strips of dough to make a star shape, just layer two strips to make an X then add remaining two on top to form a +, brush each piece with melted butter as you stack them
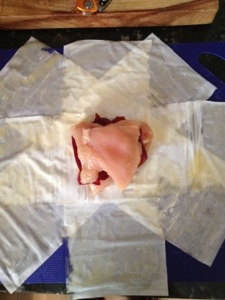
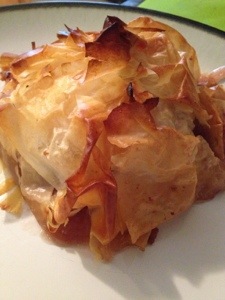
5. Place filled chicken in center of your dough star and pull ends up together in the center, pinching them closed at the top like a beggar’s purse (Note: This dough is very thin and breaks easily but as long as you aren’t going for perfection it will still taste delicious even if it doesn’t look great)
6. Bake at 375 for 25 minutes, temp chicken to ensure it is fully cooked
Serves 4

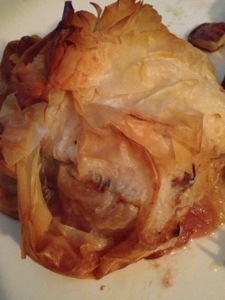
This recipe is delicious, the cranberry and chicken inside the buttery dough is so yummy! The dough is sometimes a bit tricky to work with but you just have to not worry about what it looks like and go for it. It is delicious. Let me know if you try this recipe out and what you think? We love it!

20130424-102950.jpg

20130424-102958.jpg

20130424-103009.jpg

20130424-103018.jpg

20130424-103027.jpg

Roasted Red Potatoes

I thought you might enjoy a delicious and easy side dish to go with the Herb Crusted Pork Tenderloin. These are a favorite in our house, easy and delicious.

Ingredients:
-Red Potatoes (For the two of us we generally use 6-8 and have leftovers)
-1/4 cup Olive Oil
-1/4 cup Parmesan Cheese
-1 tsp salt
-1 tbsp parsley
-1 tbsp oregano
-Garlic to taste

Directions:
-Cut the potatoes up into small pieces
-In a bowl mix olive oil, salt, parmesan cheese and spices
-Put potatoes in the bowl and toss around with mixture
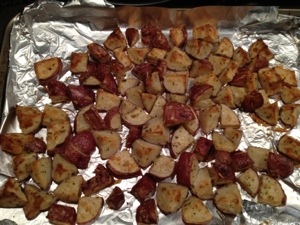
-Spread potatoes in one layer on a cookie sheet (We cover ours with foil and spray the foil with Pam)
-Cook at 425 for 45 minutes then test to see if they are done

And ta-da a delicious side dish! I thought I would post this for a little Tuesday bonus. It’s been a long day already. I had to text Tyler to find out all of the ingredients because he is the master behind making these delicious potatoes! These are just estimates of how much of each ingredient, he just kind of throws it all together. So take this and make it your own and enjoy! Let me know if you make these and if you add anything different?

20130423-151819.jpg

20130423-151826.jpg

Herb Crusted Pork Tenderloin

Before we get to the recipe I am so excited to say I have a guest post going live today at 31 Million Seconds. Kristen writes a great blog over there and is on her honeymoon right now so I was excited to get to share a post while she is enjoying a much needed vacation! So go on over and check it out!

Now to a delicious recipe, this is a meal we love and it is usually reserved for special occasions or rare occasions. We had it this past Saturday night and it was as always delicious. It is a Paula Deen recipe so you know it has to be scrumptious! I will show you the recipe here and include the link below. I hope you all enjoy this!

Ingredients:
1 pork tenderloin (we use 1 1/2 lb)
1 tablespoon salt
2 tablespoons olive oil
4 cloves garlic, pressed
1 teaspoon dried thyme
1 teaspoon dried basil
1 teaspoon drive rosemary

Directions:
1. Mix all ingredients in a small bowl
2. Rub the ingredients into the pork loin
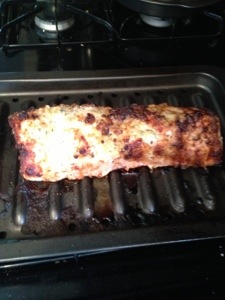
3. Place the pork loin on a roasting rack
4. Roast the pork for 30 minutes at 475
5. Turn down oven to 425 and roast for 30+ more minutes (This will vary by the size of the pork loin)
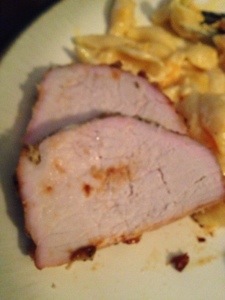
6. Check the internal temperature and when it reaches 155-165 remove from oven and allow to sit 20 minutes and it will continue to cook. (I have the required temp for meat on my meat thermometer, I make sure it soars past the well done number and then I pull it out because I am picky about my meat being well done)

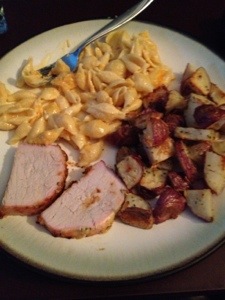
See how easy that is? We always have two delicious side dishes with this meal, macaroni and cheese and roasted red potatoes. I hope you all enjoy this easy and delicious pork tenderloin recipe.

Adapted from: Food Network

20130423-101121.jpg

20130423-101129.jpg

Weekend Wrap Up-Productivity

We had such a productive weekend, it must be the warm weather. On Friday we both got home from work a little early and went to Olive Garden for dinner. A big storm was coming so afterwords we ran to Giant to get the french bread for the Crock Pot French Toast and headed home. So Friday wasn’t that productive but the rest of the weekend was productive.

Saturday we got up and enjoyed our crock pot breakfast with some grits and then we got ready and headed to the farmers market. Since I had not made my grocery list yet we just got some local honey to hopefully help our allergies. I’ve head that helps, have y’all? I then convinced Tyler to take me to Ikea for some picture frames for some projects I am doing. Well we came out with 7 picture frames and a new dresser. We have been wanting to replace our dresser for awhile and we finally did. It looks great, but more on that later. We had lunch at Panera and who knew? They have pasta now! So that pretty much made my day because if you know me, you know I love pasta. We then headed home and stopped on the way to do our grocery shopping.

Saturday night we had another delicious meal which I will be sharing with you all this week. We ate good this weekend! Tyler put together our new dresser while I FaceTime’d with my best friend, don’t you just love modern technology! We had an adventure getting that old dresser to the driveway, now it’s waiting for us to do something with it.

Sunday was church, lunch at Bob Evans, a few more errands then home for an afternoon/evening or organizing and cleaning. Our house is really coming together. We also got a beautiful mirror to go above our new dresser. I can’t wait to share it with you all! And Sunday was another delicious meal to share. Like I said, it was a productive weekend and I got ahead on my things to blog about so stick around, give us a follow and check out our Twitter and Facebook pages (whichever you prefer). We would love for you to follow us and keep coming back because some yummy, great stuff is coming up soon!

All of my pictures of the weekend are for future posts so for now enjoy this lovely picture of my precious Dolly Wolly, who was not so precious and got a hold of one of my favorite pair of shoes, sigh.

P.S. Did you guys get anything exciting done this weekend? Any spring projects in the works?

20130422-155229.jpg

Crock Pot French Toast

This meal made me so happy! It was my first crock pot breakfast success. After a failed attempt at crock pot oatmeal and crock pot grits I decided I could not give up. So I tried again with crock pot french toast and it turned out delicious! I have not had monkey bread in awhile but this reminded me of monkey bread. Delicious, you must try it!

Ingredients:
1 loaf of bread (You can use any kind, I bought a loaf of french bread)
7 eggs
2 1/2 cups of milk
1 tsp. cinnamon (I just sprinkled the cinnamon in, I didn’t measure so I probably used more)
Filler & Topping
1/2 cup butter softened
3/4 cup brown sugar (firmly packed)
1 1/2 tsp. cinnamon (once again I just sprinkled to my hearts content)

Directions:
1. Chop up the bread into cubes
2. Spray crock-pot with cooking spray
3. Place the first layer of bread in crock-pot (Use half of the cubed bread)
4. Pour half of the Filler and Topping onto the bread
5. Put the rest of the bread in on top
6. Pour the egg mixture over the bread
7. Pour the remaining Filler and Topping over the mixture
8. Cook on Low for 6 hours (I started mine at about 10 pm and we ate it about 9:30 am and it was fine to sit staying warm in my crock pot over night)

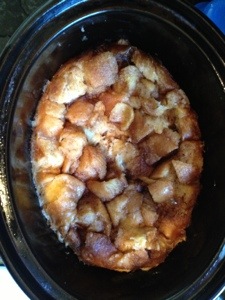
I was so excited when I came downstairs Saturday morning and tasted it and it was so yummy! I turned it back on low and let it cook without the top to try and make the top a little crisp while I made the grits to go with it. It was a delicious and easy breakfast! It would also make a delicious crock pot dessert, whatever your preference. I hope you all enjoy my first breakfast crock pot success. I hope there will be many more to come. Do any of you have good breakfast crock pot recipes? I am always open to new ones to try as I am trying to expand my recipe collection in that area!

20130422-095808.jpg

20130422-095823.jpg


Adapted from: Today’s Creative Blog

The 3rd Saturday in October

As a life long volunteer fan I bleed orange and white. What’s strange is I fell in love with a girl that bleeds crimson.. Yes the third Saturday in October at the Glover house is one in which the husband sits on the couch in silence and the wife says, oh another Touchdown, oh another touchdown, oh my is that another touchdown? Not much longer babe, Coach Jones is on a mission, and Tennessee is the waking giant the SEC had better pay attention too.

Yesterday was Tennessee’s spring football game, known as the Orange and White game. As much as I wanted to be there, we couldn’t quite make it happen this year. Being on such opposite sides of the SEC fence as we are means that Emily likes to keep the orange and white memorabilia in the back room of the house known as “my office”. Meanwhile, i use the idea of getting her a mini helmet autographed by Julio Jones as an excuse to go to the sports card and memorabilia show.
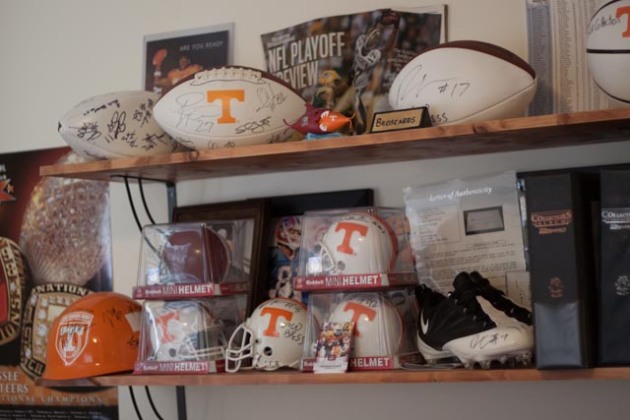
I hope to continue to grow our competing memorabilia collections, and Emily enjoys spotting her Alabama boys at the card shows. Here are a few shots of some of the gems we have stuffed back in “my office”
ImageAt the memorabilia show last year I met Jason Witten and Julio Jones and got them each to sign a helmet. On the the other side of the Julio it says, “To Emily, Roll Tide”.. I had to pay extra for the inscription. When Jason saw my UT sweatshirt, he said hey Go Vols! and inscribed his helmet Go Vols – I didnt even pay for the inscription 🙂
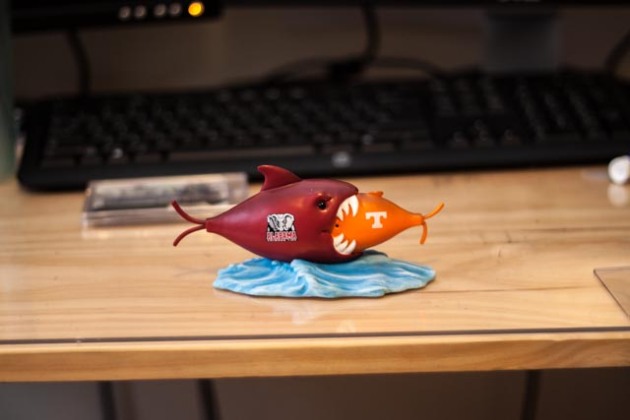
ImageThis rivalry fish was a present from Emily’s sister and husband last christmas. It now has a prominent place in the office, after Emily found it behind a Robert Meachem autographed mini helmet.. don’t know who could’ve put it there.
Image
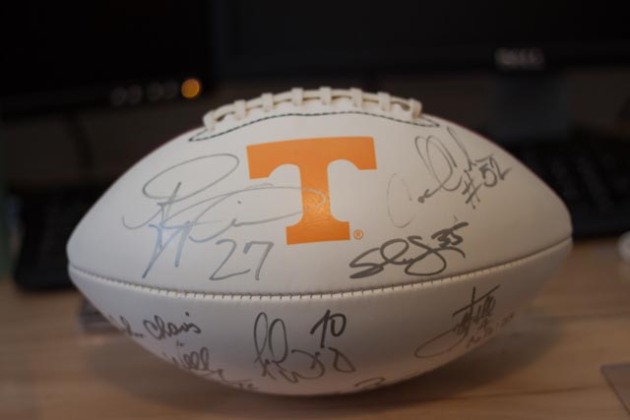
This is a ball signed by several members of the 1998 National Championship team that had a gala in 2008 in knoxville that my brother and I attended.. I know thats Al Wilson on the left, Cosey Coleman, Fred Weary , Jeff Hall, Will Offenhusel, and John Chavis – Cedric Wilson is also on there.
Image
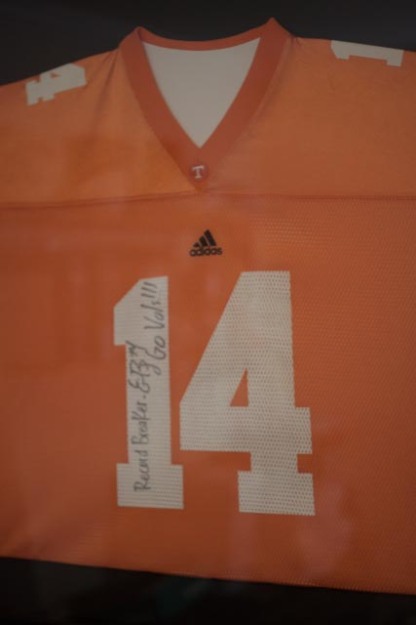
This is an Eric Berry jersey I had signed through the mail after my mom got in touch with his mom and they became email buddies for a while. He was nice enough to sign the jersey and send a few copies of a magazine he was on the cover of signed as well! Thanks EB!
Image
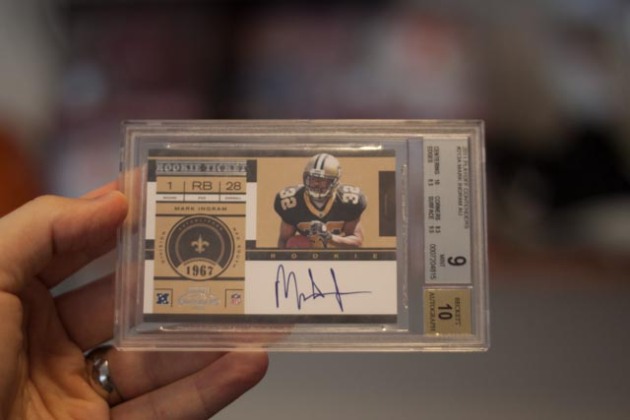
Here is a Mark Ingram Autographed football card that Emily is very proud of, and I’m a Saints fan, so thats cool with me.
Image
Here is the whole shelf!
We have a nice collection going and would love to see pictures of other peoples collections! Leave a link in the comments!!

Creamy Crock Pot Spaghetti

Pasta + a crock pot = YUM! Two of my favorite things and it was delicious. I found this recipe and just knew I had to try it out. I did it a bit different then the recipe and it was delicious. So here goes!

Ingredients:
1 26 oz jar Spaghetti Sauce (I used Ragu)
1/2 lb angel hair pasta
1/2 ground beef
1/4 cup parmesan cheese
2 oz. cream cheese

Directions:
Brown the ground beef and drain fat
Pour half the jar of spaghetti sauce into the bottom of the crock pot
Place uncooked pasta noodles on top of the sauce, break the noodles so that they fit
Pour ground beef over the pasta
Sprinkle 1/4 cup of parmesan cheese
Cut cream cheese into cubes and place on top
Cover with the last half of the jar of spaghetti sauce
Cover and cook on high for 3 hours
After 3 hours, stir it, it will be thick. Mine I thought was delicious and needed nothing more added but if you found it to be too dry then you could pour more sauce on it.

This is the recipe, there were additional steps and ingredients to add that I did not do because I thought it tasted fine after doing this. The link to the recipe I adapted this from is below. The only problem I encountered were that some of the noodles stuck together. I am not sure what would have prevented this? Maybe cooking it longer on low rather than on high or maybe being home to stir it? But since this is a crock pot meal I don’t want to have to do anything to it during the day. But it made a lot and for the two of us there were plenty of delicious noodles that hadn’t stuck together. Does anyone have any thoughts on how to prevent the noodles from sticking together?

This was a yummy, easy meal and the cream cheese really added something creamy and yummy to regular old spaghetti. And in the crock pot, win win! I hope you all enjoy this meal!

Adapted from: Picky Palate

20130419-103953.jpg

20130419-103959.jpg

Wedding Thursday-Ceremony Ideas

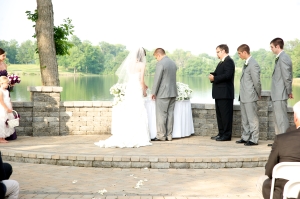
When planning my wedding I knew I wanted a few creative touches to the ceremony but I did not want it to be too long. I didn’t want to be standing up there forever, I wanted to be married! So today I am going to share with you a few ceremony ideas and I am pulling these from my wedding, my best friends and my sisters.

-Unity Sand- I had known for awhile that I wanted to do unity sand. So I went on the hunt for a pretty unity sand vase and I wanted it to have a top because I’ve heard stories of them being knocked over. I found this beautiful unity sand vase holder with a lid! It was so pretty and I thought it would look great in our house for years to come. It came with white, black and gray sand. I was wondering what the black sand was for, well we learned to late. The black sand should have been poured in the bottom in the part you cannot see. Because we did not do that our sand only comes about halfway up. And a note: it doesn’t travel well, ours is a little mixed together but it looks pretty and it’s a great memory. We took a time in the ceremony to do the sand while the trio played music.

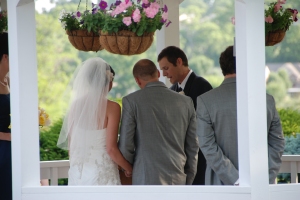
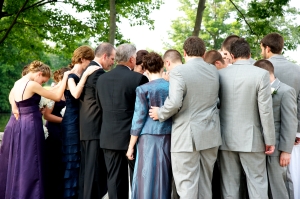
-Prayer Time- So this is an idea my best friend did at her wedding and I got married two months after her and she graciously allowed me to take this idea. At a point during the ceremony the pastor spoke about prayer and the importance of prayer in marriage and then invited the bridal party and the parents of the groom and bride to come up and lay hands on us (the bride and groom). There was a short silent time for everyone to pray and then the pastor said a prayer. I really loved this idea!

-Communion- Instead of doing a unity candle or sand my sister and her husband had a time of communion. There was a little table set up ready for them to take it. The pastor spoke about communion and then they had a time of communion and prayer to began their marriage. It was really beautiful and an idea I hadn’t really seen.

So these are just a few of the ceremony ideas I have been a part of and had not seen a lot. Do you have any unique ceremony ideas that you used or are planning to use? I’d love to hear any that you have!

DSC_5591

IDM_5930

IDM_5938