Wedding Thursday-Centerpieces

So this week I am going to tell you about my centerpieces from my wedding! Tyler gave me some great ideas for wedding posts coming up soon but I have to dig out my wedding planning notebook for the information so stay tuned for that next week 🙂

Ok the first centerpiece is one that we used at my sisters wedding and before her wedding this was a centerpiece I had never seen before. In all my research for centerpiece ideas I don’t think I came across one like this. So what we did was we got a cylinder vase and then stacked miniature fishbowls topsy turvy in the cylinder vase. In the miniature fishbowls we put white roses. At my sisters wedding we put yellow roses. We put a little bit of water in the bottom of each fishbowl. There are so many options you could do with these. You could put food coloring for colored water, you could put live fish if you loved fish (we actually saw that at a wedding at our venue), pretty rocks, sand and shells and so much more just depending on the theme of your wedding.

IDM_5814

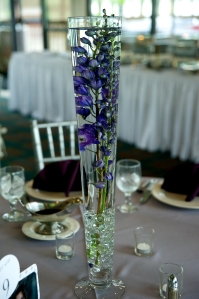
The second centerpiece that we used was a completely last minute decision. We had ordered the flowers and were doing our own flowers and a wholesale flower place where you put together all of your own flowers, more on that later. So we showed up with fishbowls to have flowers submerged in the fishbowls. Well it ended up what they got us was not going to work so fortunately they had these lovely vases available two days before my wedding to rent. We places pins in the bottoms of the flowers to anchor them down with the rocks in the bottom. We placed the flowers in then added the water on the day of the wedding. These ended up being my favorite centerpiece and they were completely last minute. One of the wedding stressors, changes in plans. Something you learn in weddings, you must be flexible!

IDM_5811

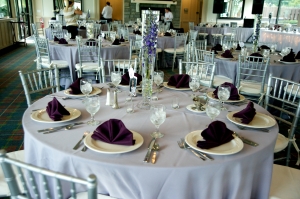
As you can see in the pictures we surrounded the centerpieces with little votive candles because who doesn’t like candles right? My other centerpiece involved a lot of candles. I don’t have a picture of it it seems but it was pretty straight forward. If you can see my tablecloths are lavender, they were supposed to be gray. Another unexpected change from a mistake that we unfortunately had to deal with. It looked great still but my colors were dark purple and gray. Flexibility. And really on the day of your wedding you don’t even notice everything it’s all a blur. It was a wonderful day!

IDM_5810

Pictures were taken by Jessica at Images by Daniel Michael

Spring Yarn Wreath

I was off of work on Friday so I decided to make a new wreath because I didn’t have one for spring yet. I searched through Pintrest and had a couple of ideas. I headed to Joann’s with coupons in hand and settled on trying out a yarn wreath with felt flowers. I bought everything I needed for 11 dollars. Thank you coupons! I love Joann’s because they let you use multiple coupons at once.

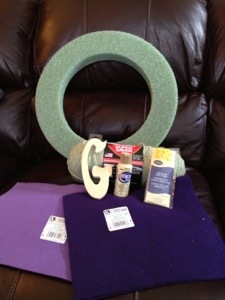
Here are the supplies I assembled, a foam wreath, yarn, felt in different colors, yellow rick rack and then I also had a wood “G” which I ended up not using. So I will save that for another project.

20130331-151250.jpg

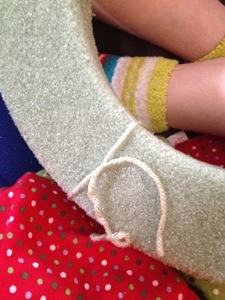
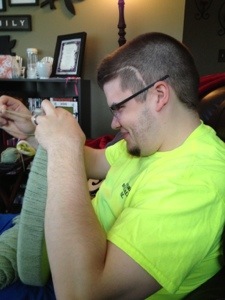
So I started off by wrapping the yarn around the wreath and tying a knot in the back. I then proceeded to wrap the yarn tightly around the wreath. Now this for me took a long time. It might be the type of wreath I chose or because I’m a little OCD sometimes. Either way it took me awhile but I turned to my DVR and settled in for some work. Tyler was kind enough to come home and do the last bit for me.

20130331-151328.jpg

20130331-151340.jpg

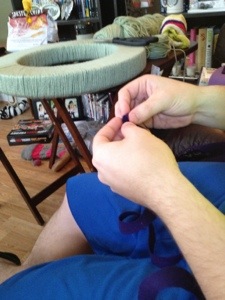
After finishing the yarn all the way around the wreath I then proceeded to make felt flowers. I searched a lot online to find a good tutorial on how to do it then I had Tyler read it and he helped me with these. What a good husband right?

20130331-151408.jpg

So to begin you cut a wavy circle from the felt. For my larger dark purple flowers I did one big circle from each piece. So you take that wavy circle and begin cutting it in a circular motion and keep cutting until you get to the end. At the end you will have a small circle which you should keep intact.

20130331-151430.jpg

Your next step is to start at the smaller end without the circle and start rolling it up tightly. I tried to keep the wavy end lined up with each other as I continued to circle around. That way once I was done it had a little flowery look to it. It’s hard to explain, it’s a little bit of trial and error. Just wrap it tightly and once you get to the end you will place the circle on the back of the flower.

20130331-151447.jpg

Once I got the circle to the back of the flower I hot glued it down then proceeded to add hot glue wherever I felt like it was needed on the outside of the flower. Then viola, felt flower! They were a lot easier than I had anticipated. Mine don’t look perfect by any means but I thought they turned out pretty good for my first go at it!

20130331-151456.jpg

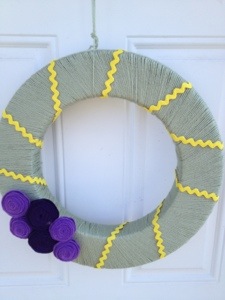
For the smaller light purple flowers I did two circles per piece of felt. I then took some yellow rick rack and wrapped it around the wreath and hot glued it on in the back.

20130331-151504.jpg

So after that I hot glued the flowers to the wreath in the lay out that I wanted. I then used some yarn to hang it up. Hanging the wreaths is always where I struggle so let me know if you have any great ideas for that?

I was very excited about how this turned out! I love it and it is very springy but can also be used in other seasons too!

Source: How to Make a Yarn Wreath for All Seasons

Wedding Thursday- Seating Chart

So one of the things I chose to do at my wedding was to have a seating chart. We had a sit down dinner and no excess seating so we thought a seating chart would be a good idea. So then the creative cap had to come on. What was a cute way to do the seating chart? I wanted it to look pretty and fit in with the decor. One weekend in October we visited our wedding venue  to show it to my in-laws and my husband. That’s right, my husband let me pick the wedding venue without ever having seen it in person. I think the words “golf course wedding” helped him agree! He’s a keeper for sure!

IDM_5807

P.S. you can click on the photos to make them bigger to get a better view!

So as we were visiting the venue a couple was about to be married there and I drew inspiration from their seating chart! The idea was to buy a beautiful frame (harder done than you would think) and to have some fabric with the chart pinned on.

We ran with that. We were unable to find a really pretty frame as big as we wanted so we ended up with a nice plain black one. We took a thin foam board and covered it in dark purple fabric and then placed it inside the frame without the glass.

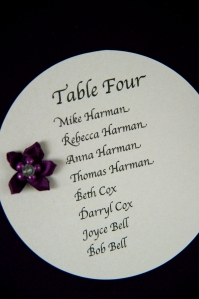
We printed the seating arrangements off the computer and cut them into circles for each table. We took them and stuck them to the fabric (with what I cannot remember) I’m going to say scrapbook tape? But it can be done many ways. Another way I had seen it done with having each one stuck on with pearl push pins but I couldn’t find any.

After sticking them on we added these cute jeweled flowers to each one for a pretty little touch and at the top of the seating chart we put a big rectangle for the head table.

IDM_5809

Most of the credit for this being done must be given to my mom. I think I remember it was a last minute thing and I was already getting beyond stressed and my mom did wonders with my idea!

So this was our idea for the seating chart. I thought it turned out really cute. We had a pretty big frame and then stood it up on an easel that the venue provided.

I am quite excited to get to go to a wedding this weekend. My sweet friend Maggie is getting married and I am so excited for her! And today is my dear friend Amanda’s birthday so a shout out to both of those wonderful friends who I have known since high school! I can’t wait to see them both this weekend and celebrate Maggie and Josh!

AMG_0781 (2)


Pictures by Jessica at Images by Daniel Michael
Spring Centerpiece!

It’s the last day of winter! Hard to believe because it snowed here yesterday and my friend in Boston woke up to 6 inches of snow this morning. But I’m sure the warm weather is just around the corner. Patience is key! So in excitement about spring coming I did a small amount of spring decorating over the weekend. By small I mean I created a spring/easter centerpiece. Since Easter is so early this year it will continue throughout the spring as the table centerpiece. You can see the remnants of Valentine’s decorating still up so the spring stuff needed to replace it!

I kind of just meandered through the aisles of Michaels and dreamed up this centerpiece. After doing my fall centerpiece which was a take on some ideas I’d seen on Pintrest I just decided to go to the store and find things!

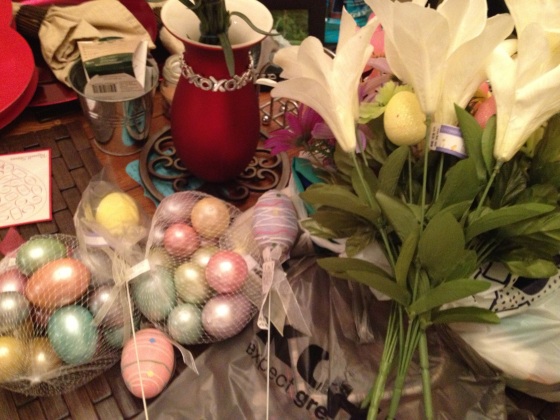
I was excited to find these pastel plastic easter eggs that looked pretty and not tacky. So I got two bags of them and used them to fill up the vase I got for a wedding gift. I then purchased some fake flowers that matched with the eggs. And a couple of stems of flowers with easter things interspersed throughout. And a couple of pretty stems with just a pretty easter egg on the end.

So it was very simple and then viola we have a touch of spring/easter in our kitchen! That’s really all the spring decorating I have done. I think I like decorating for fall and Christmas the best but I am really excited about the warm weather that is coming.

On another exciting note my flowers are beginning to bloom! I think we shared with you all in October when we planted flower bulbs and they are beginning to bloom! I will post pictures soon!

Happy Last Day of Winter!!!

My supplies!

20130319-135305.jpg

And the finished product! 

20130319-135323.jpg

Wedding Thursday!

It’s Thursday again! I love Thursdays, it’s almost the weekend, my favorite show comes on tv (The Vampire Diaries) and yeah it’s a good day. But enough about that. It’s time for another installment of Wedding Reminiscing Fun Thursday!

This week i am going to blog about my table numbers. They were one of my absolute favorite ideas for my wedding. I found a similar idea on Pintrest and then made my own version.

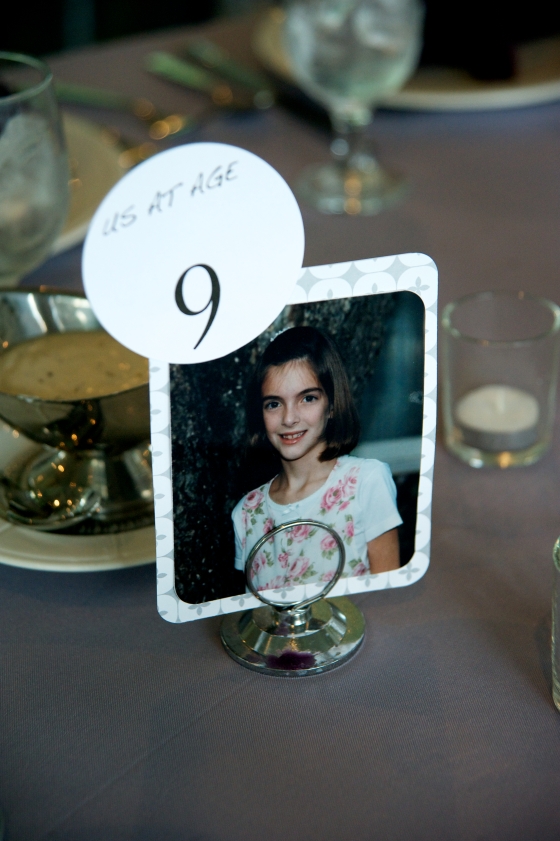
So the table numbers were done with pictures of us at the age of the table. So table number 1 had pictures of Tyler and myself at age 1. My initial idea was to do the pictures side by side so you could see us at the same age. But that ended up being too big for the holders. So we ended up doing a picture of me on one side then Tyler on the other side. That way no matter where you sat you would see a picture of someone and not a blank side.

I bought a big pack of gray, black and white scrapbook paper with different prints and then cut out a square a bit bigger than the 4×6 picture so there was a border. I would cut out two for each table number and stick them together using scrapbook tape. That way both sides had the same border from the paper.

The next step was to find pictures at that age that were both either horizontal or vertical. We found that a bit tricky but it all depends on what pictures you have. Once we had the pictures we stuck one to each side.

For the numbers we cut circles out of white card stock and printed on them “Us at age 1” “Us at age 2” etc. You will see from the picture. We stuck those on the top corner and then viola we had the cutest table numbers! I just loved them and it was fun for everyone to see pictures of us throughout the years and look at what each of us looked like at that age.

I hope someone finds this idea fun, cute and useful! Let me know your thoughts 🙂

IDM_5812 IDM_5813


Pictures by Jessica at Images by Daniel Michael
Reminiscing Wedding Fun Thursday!

So my husband and I were looking at our wedding photo slideshow last night and it got me reminiscing on planning my wedding and what fun I had with that. Of course there were many stressful moments but I had a few touches at my wedding that I just loved. So let’s call this reminiscing wedding fun Thursday shall we? I will try to post one of these each Thursday until I run out of things, and that may be fast. But we will see! So here we go with # 1.

One of my favorite things that I did and absolutely love is my guestbook. My sister got married exactly a year and 5 days before me and I had been holding onto this idea for at least three or four years since I had seen it at another wedding. So I did it for her and then for myself. I am a big fan of scrapbooking so I was able to incorporate scrapbooking with my guestbook.

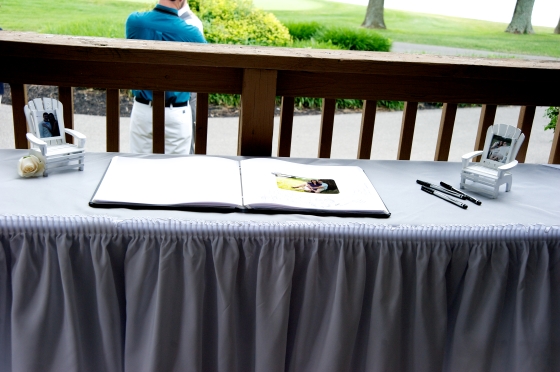
The general idea is to take a scrapbook and to put on the front of each page in the center one of our engagement pictures. The rest of the page was open for everyone to sign and leave notes. I loved this idea because it allowed for everyone to leave more than just their name but to also leave notes and I preferred it that way.

At my sisters wedding we put a page at each table with pens for everyone to sign. At my wedding however the tables were already quite crowded so we put all of the sheets in the scrapbook and had a guestbook table where people could come by and sign the book.

It turned out great and I love being able to look back and see who was there and what they had to say! So that is my reminiscing wedding fun Thursday post! I hope you all enjoyed and I hope someone uses this idea and enjoys it as much as we did!

Happy Thursday!

P.S. You will notice the page the photographer took a picture of is from my adorable little girls I used to nanny for who were my wonderful flower girls! A good choice because I don’t think anyone else drew pictures!

Image

IDM_5800


Pictures by Jessica at Images by Daniel Michael
Homemade pizza and dressing alike…

We had a pretty typical weekend. Just relaxing, I had my first full day of work on Friday which started with a 6 am alarm so I was ready to sleep in on Saturday. This week I plan to get used to waking up early every morning, driving to work, enduring DC traffic and spending all day with kids again. Oh the working life. We went out to dinner Friday, can you guess where? If you thought Olive Garden then you were correct :). We did a little shopping without spending, we are becoming pros at that. And no we aren’t shop lifting. We are resisting buying things. So I guess really I should call it browsing.

On Saturday we went shopping with Kohls cash and got some good stuff! Then as we were heading to Wal Mart for grocery shopping a massive storm hit! The clouds were crazy and super low. The wind was whipping and the rain was pouring. So we opted to stop by Giant and just pick up what we needed for dinner. I jumped out of the car at the sidewalk into about 5 inches of rain that took my flip flop. Thankfully I rescued it. We made homemade pizza on Saturday night! Homemade pizza is the only kind of pizza that I like. I made the pizza dough in the bread maker and then we halved it and each made our own personal pizzas. They turned out good except I made the mistake of cooking mine on the bottom shelf on the oven. Rock hard bottom. But Tyler’s was good! We might be needing a good Pampered Chef pizza stone for Christmas. I have also taken up cross stitch, or re taken it up. I used to do it when I was younger and now I am working on cross stitch christmas patches for our christmas stockings!

Today we went to church and it was the opening day/dedication Sunday for our church’s brand new building. It is awesome looking! The weather today is beautiful since the storm cooled it down. We did our grocery shopping, watched some football and went on a walk around the neighborhood. Earlier in the week we went on a walk dressed alike, gray shirt and red shorts, unknowingly. And today for church we both had on jeans and an earth colored shirt. We don’t plan this. It’s strange.

Hope you all had a great weekend. Oh and check out the football rankings. Both of our teams are ranked! Roll Tide and Go Vols!!! I will cheer on the Tennessee Vols until the 3rd Saturday in October. Then we will be spending game time on separate sides of the room cheering for our respective teams.

A house divided, it’s almost football time!

We have not been very interesting this week. We are still working on getting the rest of the before and after pictures ready of the house! I guess it is Monday now so I am speaking of this past week. I started my new job. My second nanny job. It is two little girls who are 2 1/2 and 6 months. I start full time next week. The new car has been great. I have not even had to fill it up yet which is amazing!

We did a little shopping this week, had a date night, and had dinner out with Matt and Katie. Matt was one of Tyler’s groomsmen and they live near us so we were excited to finally get to hang out with them!

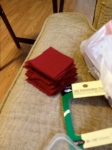
My big accomplishment for the week was my next craft project! I am making a house divided wreath, Alabama and Tennessee, in case you don’t know our teams. I am the Alabama fan and Tyler is the Tennessee fan. I started this craft by buying a white foam wreath, pieces of felt in the colors of my choice and straight pins. I cut the pieces of felt into little squares (approx. 2.5 by 2.5inches) and then folded them diagonally corner to corner and then again. Then put a straight pin through it leaving one little flap not pinned so it left it looking fluffy and somewhat covered the pin. I proceeded to continue putting these pinned felt squares all over the wreath. I only covered the front not the back because the back won’t really show. So this is my wreath. I have a wooden A and a T which I still need to paint and add on to it. I am pretty pleased by how it turned out!

We have a shorter week this week then it’s off to visit the in-laws and then a few days of lake fun with my family 🙂